
作者 | Gregory Bartholomew
譯者 | LCTT / qhwdw
在本系列教程中所構建的網路引導伺服器有一個很重要的限制,那就是所提供的作業系統映象是隻讀的。一些使用場景或許要求終端使用者能夠修改作業系統映象。例如,一些教師或許希望學生能夠安裝和配置一些像 MariaDB 和 Node.js 這樣的包來做為他們課程練習的一部分。
可寫映象的另外的好處是,終端使用者“私人定製”的作業系統,在下次不同的工作站上使用時能夠“跟著”他們。
修改 Bootmenu 應用程式以使用 HTTPS
為 bootmenu 應用程式建立一個自簽名的證書:
$ sudo -i# MY_NAME=$(</etc/hostname)# MY_TLSD=/opt/bootmenu/tls# mkdir $MY_TLSD# openssl req -newkey rsa:2048 -nodes -keyout $MY_TLSD/$MY_NAME.key -x509 -days 3650 -out $MY_TLSD/$MY_NAME.pem
驗證你的證書的值。確保 Subject 行中 CN 的值與你的 iPXE 客戶端連線你的網路引導伺服器所使用的 DNS 名字是相匹配的:
# openssl x509 -text -noout -in $MY_TLSD/$MY_NAME.pem
接下來,更新 bootmenu 應用程式去監聽 HTTPS 埠和新建立的證書及金鑰:
# sed -i "s#listen => .*#listen => ['https://$MY_NAME:443?cert=$MY_TLSD/$MY_NAME.pem\&key;=$MY_TLSD/$MY_NAME.key\&ciphers;=AES256-SHA256:AES128-SHA256:AES256-SHA:AES128-SHA'],#" /opt/bootmenu/bootmenu.conf
註意 iPXE 當前支援的[1] 加密演演算法是有限制的。
GnuTLS 要求 “CAPDACREAD_SEARCH” 能力,因此將它新增到 bootmenu 應用程式的 systemd 服務:
# sed -i '/^AmbientCapabilities=/ s/$/ CAP_DAC_READ_SEARCH/' /etc/systemd/system/bootmenu.service# sed -i 's/Serves iPXE Menus over HTTP/Serves iPXE Menus over HTTPS/' /etc/systemd/system/bootmenu.service# systemctl daemon-reload
現在,在防火牆中為 bootmenu 服務新增一個例外規則並重啟動該服務:
# MY_SUBNET=192.0.2.0# MY_PREFIX=24# firewall-cmd --add-rich-rule="rule family='ipv4' source address='$MY_SUBNET/$MY_PREFIX' service name='https' accept"# firewall-cmd --runtime-to-permanent# systemctl restart bootmenu.service
使用 wget 去驗證是否工作正常:
$ MY_NAME=server-01.example.edu$ MY_TLSD=/opt/bootmenu/tls$ wget -q --ca-certificate=$MY_TLSD/$MY_NAME.pem -O - https://$MY_NAME/menu
新增 HTTPS 到 iPXE
更新 init.ipxe 去使用 HTTPS。接著使用選項重新編譯 ipxe 引導載入器,以便它包含和信任你為 bootmenu 應用程式建立的自簽名證書:
$ echo '#define DOWNLOAD_PROTO_HTTPS' >> $HOME/ipxe/src/config/local/general.h$ sed -i 's/^chain http:/chain https:/' $HOME/ipxe/init.ipxe$ cp $MY_TLSD/$MY_NAME.pem $HOME/ipxe$ cd $HOME/ipxe/src$ make clean$ make bin-x86_64-efi/ipxe.efi EMBED=../init.ipxe CERT="../$MY_NAME.pem" TRUST="../$MY_NAME.pem"
你現在可以將啟用了 HTTPS 的 iPXE 引導載入器複製到你的客戶端上,並測試它能否正常工作:
$ cp $HOME/ipxe/src/bin-x86_64-efi/ipxe.efi $HOME/esp/efi/boot/bootx64.efi
新增使用者驗證到 Mojolicious 中
為 bootmenu 應用程式建立一個 PAM 服務定義:
# dnf install -y pam_krb5# echo 'auth required pam_krb5.so' > /etc/pam.d/bootmenu
新增一個庫到 bootmenu 應用程式中,它使用 Authen-PAM 的 Perl 模組去執行使用者驗證:
# dnf install -y perl-Authen-PAM;# MY_MOJO=/opt/bootmenu# mkdir $MY_MOJO/lib# cat << 'END' > $MY_MOJO/lib/PAM.pmpackage PAM;
use Authen::PAM;
sub auth {my $success = 0;
my $username = shift;my $password = shift;
my $callback = sub {my @res;while (@_) {my $code = shift;my $msg = shift;my $ans = "";$ans = $username if ($code == PAM_PROMPT_ECHO_ON());$ans = $password if ($code == PAM_PROMPT_ECHO_OFF());push @res, (PAM_SUCCESS(), $ans);}push @res, PAM_SUCCESS();
return @res;};
my $pamh = new Authen::PAM('bootmenu', $username, $callback);
{last unless ref $pamh;last unless $pamh->pam_authenticate() == PAM_SUCCESS;$success = 1;}
return $success;}
return 1;END
以上的程式碼是一字不差是從 Authen::PAM::FAQ 的 man 頁面中複製來的。
重定義 bootmenu 應用程式,以使它僅當提供了有效的使用者名稱和密碼之後傳回一個網路引導模板:
# cat << 'END' > $MY_MOJO/bootmenu.pl#!/usr/bin/env perl
use lib 'lib';
use PAM;use Mojolicious::Lite;use Mojolicious::Plugins;use Mojo::Util ('url_unescape');
plugin 'Config';
get '/menu';get '/boot' => sub {my $c = shift;
my $instance = $c->param('instance');my $username = $c->param('username');my $password = $c->param('password');
my $template = 'menu';
{last unless $instance =~ /^fc[[:digit:]]{2}$/;last unless $username =~ /^[[:alnum:]]+$/;last unless PAM::auth($username, url_unescape($password));$template = $instance;}
return $c->render(template => $template);};
app->start;END
bootmenu 應用程式現在查詢 lib 命令去找到相應的 WorkingDirectory。但是,預設情況下,對於 systemd 單元它的工作目錄設定為伺服器的 root 目錄。因此,你必須更新 systemd 單元去設定 WorkingDirectory 為 bootmenu 應用程式的根目錄:
# sed -i "/^RuntimeDirectory=/ a WorkingDirectory=$MY_MOJO" /etc/systemd/system/bootmenu.service# systemctl daemon-reload
更新模組去使用重定義後的 bootmenu 應用程式:
# cd $MY_MOJO/templates# MY_BOOTMENU_SERVER=$(</etc/hostname)# MY_FEDORA_RELEASES="28 29"# for i in $MY_FEDORA_RELEASES; do echo '#!ipxe' > fc$i.html.ep; grep "^kernel\|initrd" menu.html.ep | grep "fc$i" >> fc$i.html.ep; echo "boot || chain https://$MY_BOOTMENU_SERVER/menu" >> fc$i.html.ep; sed -i "/^:f$i$/,/^boot /c :f$i\nlogin\nchain https://$MY_BOOTMENU_SERVER/boot?instance=fc$i\&username;=\${username}\&password;=\${password:uristring} || goto failed" menu.html.ep; done
上面的最後的命令將生成類似下麵的三個檔案:
menu.html.ep:
#!ipxe
set timeout 5000
:menumenu iPXE Boot Menuitem --key 1 lcl 1. Microsoft Windows 10item --key 2 f29 2. RedHat Fedora 29item --key 3 f28 3. RedHat Fedora 28choose --timeout ${timeout} --default lcl selected || goto shellset timeout 0goto ${selected}
:failedecho boot failed, dropping to shell...goto shell
:shellecho type 'exit' to get the back to the menuset timeout 0shellgoto menu
:lclexit
:f29loginchain https://server-01.example.edu/boot?instance=fc29&username;=${username}&password;=${password:uristring} || goto failed
:f28loginchain https://server-01.example.edu/boot?instance=fc28&username;=${username}&password;=${password:uristring} || goto failed
fc29.html.ep:
#!ipxekernel --name kernel.efi ${prefix}/vmlinuz-4.19.5-300.fc29.x86_64 initrd=initrd.img ro ip=dhcp rd.peerdns=0 nameserver=192.0.2.91 nameserver=192.0.2.92 root=/dev/disk/by-path/ip-192.0.2.158:3260-iscsi-iqn.edu.example.server-01:fc29-lun-1 netroot=iscsi:192.0.2.158::::iqn.edu.example.server-01:fc29 console=tty0 console=ttyS0,115200n8 audit=0 selinux=0 quietinitrd --name initrd.img ${prefix}/initramfs-4.19.5-300.fc29.x86_64.imgboot || chain https://server-01.example.edu/menu
fc28.html.ep:
#!ipxekernel --name kernel.efi ${prefix}/vmlinuz-4.19.3-200.fc28.x86_64 initrd=initrd.img ro ip=dhcp rd.peerdns=0 nameserver=192.0.2.91 nameserver=192.0.2.92 root=/dev/disk/by-path/ip-192.0.2.158:3260-iscsi-iqn.edu.example.server-01:fc28-lun-1 netroot=iscsi:192.0.2.158::::iqn.edu.example.server-01:fc28 console=tty0 console=ttyS0,115200n8 audit=0 selinux=0 quietinitrd --name initrd.img ${prefix}/initramfs-4.19.3-200.fc28.x86_64.imgboot || chain https://server-01.example.edu/menu
現在,重啟動 bootmenu 應用程式,並驗證使用者認證是否正常工作:
# systemctl restart bootmenu.service
使得 iSCSI Target 可寫
現在,使用者驗證透過 iPXE 可以正常工作,在使用者連線時,你可以按需在只讀映象的上面建立每使用者可寫的overlay。使用一個 寫時複製[2] 的疊加層與簡單地為每個使用者複製原始映象相比有三個好處:
使用寫時複製的一個潛在隱患是,一旦疊加層建立後,疊加層之下的映象就不能再改變。如果它們改變,所有它們之上的疊加層將出錯。因此,疊加層必須被刪除並用新的、空白的進行替換。即便只是簡單地以讀寫樣式載入的映象,也可能因為某些檔案系統更新導致疊加層出錯。
由於這個隱患,如果原始映象被修改將導致疊加層出錯,因此執行下列的命令,將原始映象標記為不可改變:
# chattr +i </path/to/file>
你可以使用 lsattr
去檢視不可改變標誌,並可以使用 chattr -i 取消設定不可改變標誌。在設定了不可改變標誌之後,即便是 root 使用者或以 root 執行的系統行程也不修改或刪除這個檔案。
停止 tgtd.service 之後,你就可以改變映象檔案:
# systemctl stop tgtd.service
當仍有連線開啟的時候,執行這個命令一般需要一分鐘或更長的時間。
現在,移除只讀的 iSCSI 出口。然後更新模板中的 readonly-root 配置檔案,以使映象不再是隻讀的:
# MY_FC=fc29# rm -f /etc/tgt/conf.d/$MY_FC.conf# TEMP_MNT=$(mktemp -d)# mount /$MY_FC.img $TEMP_MNT# sed -i 's/^READONLY=yes$/READONLY=no/' $TEMP_MNT/etc/sysconfig/readonly-root# sed -i 's/^Storage=volatile$/#Storage=auto/' $TEMP_MNT/etc/systemd/journald.conf# umount $TEMP_MNT
將 journald 日誌從傳送到記憶體修改回預設值(如果 /var/log/journal 存在的話記錄到磁碟),因為一個使用者報告說,他的客戶端由於應用程式生成了大量的系統日誌而產生記憶體上限溢位錯誤,導致它的客戶端被卡住。而將日誌記錄到磁碟的負面影響是客戶端產生了額外的寫入流量,這將在你的網路引導伺服器上可能增加一些沒有必要的 I/O。你應該去決定到底使用哪個選擇 —— 記錄到記憶體還是記錄到硬碟 —— 哪個更合適取決於你的環境。
因為你的模板映象在以後不能做任何的更改,因此在它上面設定不可更改標誌,然後重啟動 tgtd.service:
# chattr +i /$MY_FC.img# systemctl start tgtd.service
現在,更新 bootmenu 應用程式:
# cat << 'END' > $MY_MOJO/bootmenu.pl#!/usr/bin/env perl
use lib 'lib';
use PAM;use Mojolicious::Lite;use Mojolicious::Plugins;use Mojo::Util ('url_unescape');
plugin 'Config';
get '/menu';get '/boot' => sub {my $c = shift;
my $instance = $c->param('instance');my $username = $c->param('username');my $password = $c->param('password');
my $chapscrt;my $template = 'menu';
{last unless $instance =~ /^fc[[:digit:]]{2}$/;last unless $username =~ /^[[:alnum:]]+$/;last unless PAM::auth($username, url_unescape($password));last unless $chapscrt = `sudo scripts/mktgt $instance $username`;$template = $instance;}
return $c->render(template => $template, username => $username, chapscrt => $chapscrt);};
app->start;END
新版本的 bootmenu 應用程式呼叫一個定製的 mktgt 指令碼,如果成功,它將為每個它自己建立的新的 iSCSI 標的傳回一個隨機的 CHAP[3] 密碼。這個 CHAP 密碼可以防止其它使用者的 iSCSI 標的以間接方式掛載這個使用者的標的。這個應用程式只有在使用者密碼認證成功之後才傳回一個正確的 iSCSI 標的密碼。
mktgt 指令碼要加 sudo 字首來執行,因為它需要 root 許可權去建立標的。
$username 和 $chapscrt 變數也傳遞給 render 命令,因此在需要的時候,它們也能夠被納入到模板中傳回給使用者。
接下來,更新我們的引導模板,以便於它們能夠讀取使用者名稱和 chapscrt 變數,並傳遞它們到所屬的終端使用者。也要更新模板以 rw(讀寫)樣式載入根檔案系統:
# cd $MY_MOJO/templates# sed -i "s/:$MY_FC/:$MY_FC-/g" $MY_FC.html.ep# sed -i "s/ netroot=iscsi:/ netroot=iscsi::@/" $MY_FC.html.ep# sed -i "s/ ro / rw /" $MY_FC.html.ep
執行上面的命令後,你應該會看到如下的引導模板:
#!ipxekernel --name kernel.efi ${prefix}/vmlinuz-4.19.5-300.fc29.x86_64 initrd=initrd.img rw ip=dhcp rd.peerdns=0 nameserver=192.0.2.91 nameserver=192.0.2.92 root=/dev/disk/by-path/ip-192.0.2.158:3260-iscsi-iqn.edu.example.server-01:fc29- $username %>-lun-1 netroot=iscsi: $username %>: $chapscrt %>@192.0.2.158::::iqn.edu.example.server-01:fc29- $username %> console=tty0 console=ttyS0,115200n8 audit=0 selinux=0 quietinitrd --name initrd.img ${prefix}/initramfs-4.19.5-300.fc29.x86_64.imgboot || chain https://server-01.example.edu/menu
註意:如果在 插入[4] 變數後需要檢視引導模板,你可以在 boot 命令之前,在它自己的行中插入 shell 命令。然後在你網路引導你的客戶端時,iPXE 將在那裡給你提供一個用於互動的 shell,你可以在 shell 中輸入 imgstat 去檢視傳遞到內核的引數。如果一切正確,你可以輸入 exit 去退出 shell 並繼續引導過程。
現在,透過 sudo 允許 bootmenu 使用者以 root 許可權去執行 mktgt 指令碼(僅這個指令碼):
# echo "bootmenu ALL = NOPASSWD: $MY_MOJO/scripts/mktgt *" > /etc/sudoers.d/bootmenu
bootmenu 使用者不應該寫訪問 mktgt 指令碼或在它的家目錄下的任何其它檔案。在 /opt/bootmenu 目錄下的所有檔案的屬主應該是 root,並且不應該被其它任何 root 以外的使用者可寫。
sudo 在使用 systemd 的 DynamicUser 選項下不能正常工作,因此建立一個普通使用者帳戶,並設定 systemd 服務以那個使用者執行:
# useradd -r -c 'iPXE Boot Menu Service' -d /opt/bootmenu -s /sbin/nologin bootmenu# sed -i 's/^DynamicUser=true$/User=bootmenu/' /etc/systemd/system/bootmenu.service# systemctl daemon-reload
最後,為寫時複製改寫建立一個目錄,並建立管理 iSCSI 標的的 mktgt 指令碼和它們的改寫支援儲存:
# mkdir /$MY_FC.cow# mkdir $MY_MOJO/scripts# cat << 'END' > $MY_MOJO/scripts/mktgt#!/usr/bin/env perl
# if another instance of this script is running, wait for it to finish"$ENV{FLOCKER}" eq 'MKTGT' or exec "env FLOCKER=MKTGT flock /tmp $0 @ARGV";
# use "RETURN" to print to STDOUT; everything else goes to STDERR by defaultopen(RETURN, '>&', STDOUT);open(STDOUT, '>&', STDERR);
my $instance = shift or die "instance not provided";my $username = shift or die "username not provided";
my $img = "/$instance.img";my $dir = "/$instance.cow";my $top = "$dir/$username";
-f "$img" or die "'$img' is not a file";-d "$dir" or die "'$dir' is not a directory";
my $base;die unless $base = `losetup --show --read-only --nooverlap --find $img`;chomp $base;
my $size;die unless $size = `blockdev --getsz $base`;chomp $size;
# create the per-user sparse file if it does not existif (! -e "$top") {die unless system("dd if=/dev/zero of=$top status=none bs=512 count=0 seek=$size") == 0;}
# create the copy-on-write overlay if it does not existmy $cow="$instance-$username";my $dev="/dev/mapper/$cow";if (! -e "$dev") {my $over;die unless $over = `losetup --show --nooverlap --find $top`;chomp $over;die unless system("echo 0 $size snapshot $base $over p 8 | dmsetup create $cow") == 0;}
my $tgtadm = '/usr/sbin/tgtadm --lld iscsi';
# get textual representations of the iscsi targetsmy $text = `$tgtadm --op show --mode target`;my @targets = $text =~ /(?:^T.*\n)(?:^ .*\n)*/mg;
# convert the textual representations into a hash tablemy $targets = {};foreach (@targets) {my $tgt;my $sid;
foreach (split /\n/) {/^Target (\d+)(?{ $tgt = $targets->{$^N} = [] })/;/I_T nexus: (\d+)(?{ $sid = $^N })/;/Connection: (\d+)(?{ push @{$tgt}, [ $sid, $^N ] })/;}}
my $hostname;die unless $hostname = `hostname`;chomp $hostname;
my $target = 'iqn.' . join('.', reverse split('\.', $hostname)) . ":$cow";
# find the target id corresponding to the provided target name and# close any existing connections to itmy $tid = 0;foreach (@targets) {next unless /^Target (\d+)(?{ $tid = $^N }): $target$/m;foreach (@{$targets->{$tid}}) {die unless system("$tgtadm --op delete --mode conn --tid $tid --sid $_->[0] --cid $_->[1]") == 0;}}
# create a new target if an existing one was not foundif ($tid == 0) {# find an available target idmy @ids = (0, sort keys %{$targets});$tid = 1; while ($ids[$tid]==$tid) { $tid++ }
# create the targetdie unless -e "$dev";die unless system("$tgtadm --op new --mode target --tid $tid --targetname $target") == 0;die unless system("$tgtadm --op new --mode logicalunit --tid $tid --lun 1 --backing-store $dev") == 0;die unless system("$tgtadm --op bind --mode target --tid $tid --initiator-address ALL") == 0;}
# (re)set the provided target's chap passwordmy $password = join('', map(chr(int(rand(26))+65), 1..8));my $accounts = `$tgtadm --op show --mode account`;if ($accounts =~ / $username$/m) {die unless system("$tgtadm --op delete --mode account --user $username") == 0;}die unless system("$tgtadm --op new --mode account --user $username --password $password") == 0;die unless system("$tgtadm --op bind --mode account --tid $tid --user $username") == 0;
# return the new password to the iscsi target on stdoutprint RETURN $password;END# chmod +x $MY_MOJO/scripts/mktgt
上面的指令碼將做以下五件事情:
/.cow/ 稀疏檔案(如果不存在的話)。/dev/mapper/- 裝置節點作為 iSCSI 標的的寫時複製支援儲存(如果不存在的話)。iqn.:- iSCSI 標的(如果不存在的話)。或者,如果已存在了,它將關閉任何已存在的連線,因為在任何時刻,映象只能以只讀樣式從一個地方開啟。iqn.:- iSCSI 標的上(重新)設定 chap 密碼為一個新的隨機值。你應該可以在命令列上透過使用有效的測試引數來執行它,以測試 mktgt 指令碼能否正常工作。例如:
# echo `$MY_MOJO/scripts/mktgt fc29 jsmith`
當你從命令列上執行時,mktgt 指令碼應該會輸出 iSCSI 標的的一個隨意的八字元隨機密碼(如果成功的話)或者是出錯位置的行號(如果失敗的話)。
有時候,你可能需要在不停止整個服務的情況下刪除一個 iSCSI 標的。例如,一個使用者可能無意中損壞了他的個人映象,在那種情況下,你可能需要按步驟撤銷上面的 mktgt 指令碼所做的事情,以便於他下次登入時他將得到一個原始映象。
下麵是用於撤銷的 rmtgt 指令碼,它以相反的順序做了上面 mktgt 指令碼所做的事情:
# mkdir $HOME/bin# cat << 'END' > $HOME/bin/rmtgt#!/usr/bin/env perl
@ARGV >= 2 or die "usage: $0; [+d|+f]\n"
my $instance = shift;my $username = shift;
my $rmd = ($ARGV[0] eq '+d'); #remove device node if +d flag is setmy $rmf = ($ARGV[0] eq '+f'); #remove sparse file if +f flag is setmy $cow = "$instance-$username";
my $hostname;die unless $hostname = `hostname`;chomp $hostname;
my $tgtadm = '/usr/sbin/tgtadm';my $target = 'iqn.' . join('.', reverse split('\.', $hostname)) . ":$cow";
my $text = `$tgtadm --op show --mode target`;my @targets = $text =~ /(?:^T.*\n)(?:^ .*\n)*/mg;
my $targets = {};foreach (@targets) {my $tgt;my $sid;
foreach (split /\n/) {/^Target (\d+)(?{ $tgt = $targets->{$^N} = [] })/;/I_T nexus: (\d+)(?{ $sid = $^N })/;/Connection: (\d+)(?{ push @{$tgt}, [ $sid, $^N ] })/;}}
my $tid = 0;foreach (@targets) {next unless /^Target (\d+)(?{ $tid = $^N }): $target$/m;foreach (@{$targets->{$tid}}) {die unless system("$tgtadm --op delete --mode conn --tid $tid --sid $_->[0] --cid $_->[1]") == 0;}die unless system("$tgtadm --op delete --mode target --tid $tid") == 0;print "target $tid deleted\n";sleep 1;}
my $dev = "/dev/mapper/$cow";if ($rmd or ($rmf and -e $dev)) {die unless system("dmsetup remove $cow") == 0;print "device node $dev deleted\n";}
if ($rmf) {my $sf = "/$instance.cow/$username";die "sparse file $sf not found" unless -e "$sf";die unless system("rm -f $sf") == 0;die unless not -e "$sf";print "sparse file $sf deleted\n";}END# chmod +x $HOME/bin/rmtgt
例如,使用上面的指令碼去完全刪除 fc29-jsmith 標的,包含它的支援儲存裝置節點和稀疏檔案,可以按下列方式執行命令:
# rmtgt fc29 jsmith +f
一旦你驗證 mktgt 指令碼工作正常,你可以重啟動 bootmenu 服務。下次有人從網路引導時,他們應該能夠接收到一個他們可以寫入的、可”私人定製“的網路引導映象的副本:
# systemctl restart bootmenu.service
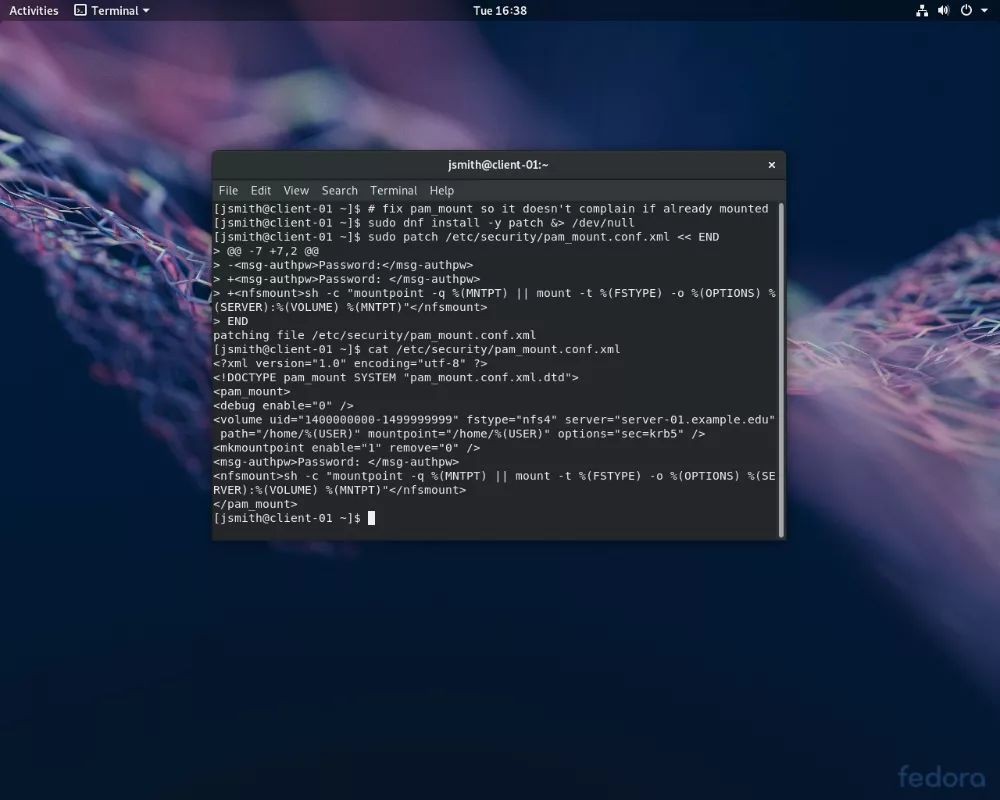
現在,就像下麵的截圖示範的那樣,使用者應該可以修改根檔案系統了:
via: https://fedoramagazine.org/how-to-build-a-netboot-server-part-4/
作者:Gregory Bartholomew[7] 選題:lujun9972 譯者:qhwdw 校對:wxy
本文由 LCTT 原創編譯,Linux中國 榮譽推出