作者: Domo
連結:https://juejin.im/post/5b97743df265da0af21351aa
前言:
最近抽空面了幾家公司,大部分都是從基礎開始慢慢深入專案和原理。面試內容還是以OC為主,但是多數也都會問一下Swift技術情況,也有例外全程問Swift的公司(做區塊鏈專案),感覺現在雖然大多數公司任然以OC做為主開發語言,但是Swift發展很強勢,估計明年Swift5以後使用會更加廣泛。
另外,如果準備跳槽的話,可以提前投簡歷抽空面試幾家公司,一方面可以透過投遞反饋檢驗簡歷,另外可以總結面試的大致問題方向有利於做針對性複習,畢竟會用也要會說才行,會說也要能說到重點才行,還有就是心儀的公司一定要留到最後面試。希望都能進一個心儀不坑的公司,當然也應努力提升自己的技術,不坑公司不坑團隊, 好像跑題了!!!
目錄:
上一個仿寫專案GitHub:https://github.com/daomoer/YYSwiftProject 專案分析地址:Swift仿寫有妖氣漫畫https://juejin.im/post/5b7135db6fb9a009a257e557
本專案開始前準備階段:Swift高仿喜馬拉雅APP之一Charles抓包、圖片資源獲取等https://juejin.im/post/5b878eb9e51d4538c631414b
本專案GitHub:https://github.com/daomoer/XMLYFM
關於專案:
該專案採用MVC+MVVM設計樣式,Moya+SwiftyJSON+HandyJSON網路框架和資料解析。資料來源抓包及部分本地json檔案。使用Xcode9.4基於Swift4.1進行開發。專案中使用到的一些開源庫以下串列,在這裡感謝作者的開源。
    pod 'SnapKit'
    pod 'Kingfisher'
    #tabbar樣式
    pod 'ESTabBarController-swift'
    #banner滾動圖片
    pod 'FSPagerView'
    pod 'Moya'
    pod 'HandyJSON'
    pod 'SwiftyJSON'
    # 分頁
    pod 'DNSPageView'
    #跑馬燈
    pod 'JXMarqueeView'
    #滾動頁
    pod 'LTScrollView'
    #掃清
    pod 'MJRefresh'
    #訊息提示
    pod 'SwiftMessages'
    pod 'SVProgressHUD'
    #播放網路音訊
    pod 'StreamingKit'
效果圖


專案按照MVVM樣式進行設計,下麵貼一下ViewModel中介面請求和佈局設定方法程式碼。
import UIKit
import SwiftyJSON
import HandyJSON
class HomeRecommendViewModel: NSObject {
    // MARK - 資料模型
     var fmhomeRecommendModel:FMHomeRecommendModel?
     var homeRecommendList:[HomeRecommendModel]?
     var recommendList : [RecommendListModel]?
    // Mark: -資料源更新
    typealias AddDataBlock = () ->Void
    var updataBlock:AddDataBlock?

// Mark:-請求資料
extension HomeRecommendViewModel {
    func refreshDataSource() {
        //首頁推薦介面請求
        FMRecommendProvider.request(.recommendList) { result in
            if case let .success(response) = result {
                //解析資料
                let data = try? response.mapJSON()
                let json = JSON(data!)
                if let mappedObject = JSONDeserializer.deserializeFrom(json: json.description) { // 從字串轉換為物件實體
                    self.fmhomeRecommendModel = mappedObject
                    self.homeRecommendList = mappedObject.list
                    if let recommendList = JSONDeserializer.deserializeModelArrayFrom(json: json["list"].description) {
                        self.recommendList = recommendList as? [RecommendListModel]
                    }
            }
      }
}

// Mark:-collectionview資料
extension HomeRecommendViewModel {
    func numberOfSections(collectionView:UICollectionView) ->Int {
        return (self.homeRecommendList?.count) ?? 0
    }
    // 每個分割槽顯示item數量
    func numberOfItemsIn(section: NSInteger) -> NSInteger {
        return 1
    }
    //每個分割槽的內邊距
    func insetForSectionAt(section: Int) -> UIEdgeInsets {
        return UIEdgeInsetsMake(0, 0, 0, 0)
    }
    //最小 item 間距
    func minimumInteritemSpacingForSectionAt(section:Int) ->CGFloat {
        return 0
    }
    //最小行間距
    func minimumLineSpacingForSectionAt(section:Int) ->CGFloat {
        return 0
    }
   // 分割槽頭檢視size
    func referenceSizeForHeaderInSection(section: Int) -> CGSize {
        let moduleType = self.homeRecommendList?[section].moduleType
        if moduleType == "focus" || moduleType == "square" || moduleType == "topBuzz" || moduleType == "ad" || section == 18 {
            return CGSize.zero
        }else {
            return CGSize.init(width: YYScreenHeigth, height:40)
        }
    }

    // 分割槽尾檢視size
    func referenceSizeForFooterInSection(section: Int) -> CGSize {
        let moduleType = self.homeRecommendList?[section].moduleType
        if moduleType == "focus" || moduleType == "square" {
            return CGSize.zero
        }else {
            return CGSize.init(width: YYScreenWidth, height: 10.0)
        }
    }
}
與ViewModel相對應的是控制器Controller.m檔案中的使用,使用MVVM可以梳理Controller看起來更整潔一點,避免滿眼的邏輯判斷。
    lazy var viewModel: HomeRecommendViewModel = {
        return HomeRecommendViewModel()
    }()
    override func viewDidLoad() {
        super.viewDidLoad()
        self.view.addSubview(self.collectionView)
        self.collectionView.snp.makeConstraints { (make) in
            make.width.height.equalToSuperview()
            make.center.equalToSuperview()
        }
        self.collectionView.uHead.beginRefreshing()
        loadData()
        loadRecommendAdData()
    }
    func loadData(){
        // 載入資料
        viewModel.updataBlock = { [unowned self] in
            self.collectionView.uHead.endRefreshing()
            // 更新串列資料
            self.collectionView.reloadData()
        }
        viewModel.refreshDataSource()
    }

// MARK - collectionDelegate
extension HomeRecommendController: UICollectionViewDelegateFlowLayout, UICollectionViewDataSource, UICollectionViewDelegate {

    func numberOfSections(in collectionView: UICollectionView) -> Int {
        return viewModel.numberOfSections(collectionView:collectionView)
    }

    func collectionView(_ collectionView: UICollectionView, numberOfItemsInSection section: Int) -> Int {
        return viewModel.numberOfItemsIn(section: section)
    }
      //每個分割槽的內邊距
    func collectionView(_ collectionView: UICollectionView, layout collectionViewLayout: UICollectionViewLayout, insetForSectionAt section: Int) -> UIEdgeInsets {
        return viewModel.insetForSectionAt(section: section)
    }

    //最小 item 間距
    func collectionView(_ collectionView: UICollectionView, layout collectionViewLayout: UICollectionViewLayout, minimumInteritemSpacingForSectionAt section: Int) -> CGFloat {
        return viewModel.minimumInteritemSpacingForSectionAt(section: section)
    }

    //最小行間距
    func collectionView(_ collectionView: UICollectionView, layout collectionViewLayout: UICollectionViewLayout, minimumLineSpacingForSectionAt section: Int) -> CGFloat {
        return viewModel.minimumLineSpacingForSectionAt(section: section)
    }

    //item 的尺寸
    func collectionView(_ collectionView: UICollectionView, layout collectionViewLayout: UICollectionViewLayout, sizeForItemAt indexPath: IndexPath) -> CGSize {
       return viewModel.sizeForItemAt(indexPath: indexPath)
    }

    func collectionView(_ collectionView: UICollectionView, layout collectionViewLayout: UICollectionViewLayout, referenceSizeForHeaderInSection section: Int) -> CGSize {
        return viewModel.referenceSizeForHeaderInSection(section: section)
    }

    func collectionView(_ collectionView: UICollectionView, layout collectionViewLayout: UICollectionViewLayout, referenceSizeForFooterInSection section: Int) -> CGSize {
       return viewModel.referenceSizeForFooterInSection(section: section)
    }
首頁模組分析:
專案首頁推薦模組,根據介面請求資料進行處理,頂部的Banner滾動圖片和分類按鈕以及下麵的聽頭條統一劃分為HeaderCell,在這個HeaderCell中繼續劃分,頂部Banner單獨處理,下麵建立CollectionView,並把分類按鈕和聽頭條作為兩個Section,其中聽頭條的實現思路為CollectionCell,透過定時器控制器自動上下滾動。

點選檢視動圖
首頁推薦的其他模組根據介面請求得到的moduleType進行Section初始化並傳回不同樣式的Cell,另外在該模組中還穿插有廣告,廣告為單獨介面,根據介面傳回資料穿插到對應的Section。
    func collectionView(_ collectionView: UICollectionView, cellForItemAt indexPath: IndexPath) -> UICollectionViewCell {
        let moduleType = viewModel.homeRecommendList?[indexPath.section].moduleType
        if moduleType == "focus" || moduleType == "square" || moduleType == "topBuzz" {
                let cell:FMRecommendHeaderCell = collectionView.dequeueReusableCell(withReuseIdentifier: FMRecommendHeaderCellID, for: indexPath) as! FMRecommendHeaderCell
                cell.focusModel = viewModel.focus
                cell.squareList = viewModel.squareList
                cell.topBuzzListData = viewModel.topBuzzList
                cell.delegate = self
                return cell
        }else if moduleType == "guessYouLike" || moduleType == "paidCategory" || moduleType == "categoriesForLong" || moduleType == "cityCategory"{
            ///橫式排列佈局cell
                let cell:FMRecommendGuessLikeCell = collectionView.dequeueReusableCell(withReuseIdentifier: FMRecommendGuessLikeCellID, for: indexPath) as! FMRecommendGuessLikeCell
                cell.delegate = self
                cell.recommendListData = viewModel.homeRecommendList?[indexPath.section].list
                return cell
        }else if moduleType == "categoriesForShort" || moduleType == "playlist" || moduleType == "categoriesForExplore"{
            // 豎式排列佈局cell
                let cell:FMHotAudiobookCell = collectionView.dequeueReusableCell(withReuseIdentifier: FMHotAudiobookCellID, for: indexPath) as! FMHotAudiobookCell
            cell.delegate = self
                cell.recommendListData = viewModel.homeRecommendList?[indexPath.section].list
                return cell
        }else if moduleType == "ad" {
                let cell:FMAdvertCell = collectionView.dequeueReusableCell(withReuseIdentifier: FMAdvertCellID, for: indexPath) as! FMAdvertCell
            if indexPath.section == 7 {
                cell.adModel = self.recommnedAdvertList?[0]
            }else if indexPath.section == 13 {
                cell.adModel = self.recommnedAdvertList?[1]
            }
                return cell
        }else if moduleType == "oneKeyListen" {
                let cell:FMOneKeyListenCell = collectionView.dequeueReusableCell(withReuseIdentifier: FMOneKeyListenCellID, for: indexPath) as! FMOneKeyListenCell
            cell.oneKeyListenList = viewModel.oneKeyListenList
                return cell
        }else if moduleType == "live" {
            let cell:HomeRecommendLiveCell = collectionView.dequeueReusableCell(withReuseIdentifier: HomeRecommendLiveCellID, for: indexPath) as! HomeRecommendLiveCell
            cell.liveList = viewModel.liveList
            return cell
        }
        else {
                let cell:FMRecommendForYouCell = collectionView.dequeueReusableCell(withReuseIdentifier: FMRecommendForYouCellID, for: indexPath) as! FMRecommendForYouCell
                return cell

        }

    }
專案中分割槽尺寸高度是根據傳回資料的Count進行計算的,其他各模組基本思路相同這裡只貼一下首頁模組分割槽的尺寸高度計算。
   // item 尺寸
    func sizeForItemAt(indexPath: IndexPath) -> CGSize {
        let HeaderAndFooterHeight:Int = 90
        let itemNums = (self.homeRecommendList?[indexPath.section].list?.count)!/3
        let count = self.homeRecommendList?[indexPath.section].list?.count
        let moduleType = self.homeRecommendList?[indexPath.section].moduleType
        if moduleType == "focus" {
            return CGSize.init(width:YYScreenWidth,height:360)
        }else if moduleType == "square" || moduleType == "topBuzz" {
            return CGSize.zero
        }else if moduleType == "guessYouLike" || moduleType == "paidCategory" || moduleType == "categoriesForLong" || moduleType == "cityCategory" || moduleType == "live"{
            return CGSize.init(width:YYScreenWidth,height:CGFloat(HeaderAndFooterHeight+180*itemNums))
        }else if moduleType == "categoriesForShort" || moduleType == "playlist" || moduleType == "categoriesForExplore"{
            return CGSize.init(width:YYScreenWidth,height:CGFloat(HeaderAndFooterHeight+120*count!))
        }else if moduleType == "ad" {
            return CGSize.init(width:YYScreenWidth,height:240)
        }else if moduleType == "oneKeyListen" {
            return CGSize.init(width:YYScreenWidth,height:180)
        }else {
            return .zero
        }
    }
首頁分類模組分析:
首頁分類採用的是CollectionView展示分類串列,點選每個分類Item進入對應的分類介面,根據categoryId請求頂部滾動title資料,另外該資料不包含推薦模組,所以分類整體為兩個Controller,一個為推薦模組,一個為其他分類介面根據不同categoryId顯示不同資料串列(因為該介面資料樣式一樣都是串列),然後推薦部分按照首頁的同等思路根據不同的moduleType顯示不同型別Cell。

首頁Vip模組分析:
首頁Vip模組與推薦模組較為相似,頂部Banner滾動圖片和分類按鈕作為頂部Cell,然後其他Cell橫向顯示或者是豎向顯示以及顯示的Item數量根據介面而定,分割槽的標題同樣來自於介面資料,點選分割槽essay-headerVeiw的更多按鈕跳轉到該分割槽模組的更多頁面。

首頁直播模組分析:
首頁直播介面的排版主要分四個部分也就是自定義四個CollectionCell,頂部分類按鈕,接著是Banner滾動圖片Cell內部使用FSPagerView實現滾動圖片效果,滾動排行榜為Cell內部巢狀CollectionView,透過定時器控制CollectionCell實現自動滾動,接下來就是播放串列了,透過自定義HeaderView上面的按鈕切換,掃清不同型別的播放串列。


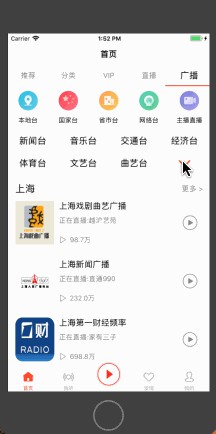
首頁廣播模組分析:
首頁廣播模組主要分三個部分,頂部分類按鈕Cell,中間可展開收起分類Item,因為介面中傳回的是14個電臺分類,收起狀態顯示7個電臺和展開按鈕,展開狀態顯示14個電臺和收起按鈕中間空一格Item,在ViewModel中獲取到資料之後進行插入圖片按鈕並根據當前展開或是收起狀態傳回不同Item資料來實現這部分功能,剩下的是根據資料介面中的分割槽顯示串列和HeaderView內容。
點選廣播頂部分類Item跳轉到對應介面,但是介面傳回的該Item引數為Url中拼接的欄位例如:url:”iting://open?msg_type=70&api;=http://live.ximalaya.com/live-web/v2/radio/national&title;=國家臺&type;=national”,所以我們要解析Url拼接引數為字典,拿到我們所需的跳轉下一介面請求介面用到的欄位。下麵為程式碼部分:
func getUrlAPI(url:String) -> String {
       // 判斷是否有引數
       if !url.contains("?") {
           return ""
       }
       var params = [String: Any]()
       // 擷取引數
       let split = url.split(separator: "?")
       let string = split[1]
       // 判斷引數是單個引數還是多個引數
       if string.contains("&") {
           // 多個引數,分割引數
           let urlComponents = string.split(separator: "&")
           // 遍歷引數
           for keyValuePair in urlComponents {
               // 生成Key/Value
               let pairComponents = keyValuePair.split(separator: "=")
               let key:String = String(pairComponents[0])
               let value:String = String(pairComponents[1])

               params[key] = value
           }
       } else {
           // 單個引數
           let pairComponents = string.split(separator: "=")
           // 判斷是否有值
           if pairComponents.count == 1 {
               return "nil"
           }
           let key:String = String(pairComponents[0])
           let value:String = String(pairComponents[1])
           params[key] = value as AnyObject
       }
       guard let api = params["api"] else{return ""}
       return api as! String
   }
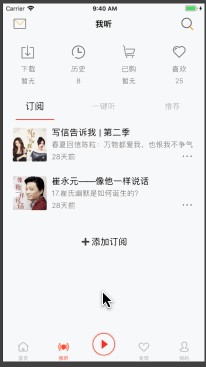
我聽模組分析:
我聽模組主頁面頂部為自定義HeaderView,內部迴圈建立按鈕,下麵為使用LTScrollView管理三個子模組的滾動檢視,訂閱和推薦為固定串列顯示介面資料,一鍵聽模組也是現實串列資料,其中有個跑馬燈滾動顯示重要內容的效果,點選新增頻道,跳轉更多頻道介面,該介面為雙TableView實現聯動效果,點選左邊分類LeftTableView對應右邊RightTableView滾動到指定分割槽,滾動右邊RightTableView對應的左邊LeftTableView滾動到對應分類。

發現模組分析:
發現模組主頁面頂部為自定義HeaderView,內部巢狀CollectionView建立分類按鈕Item,下麵為使用LTScrollView管理三個子模組的滾動檢視,關註和推薦動態類似都是顯示圖片加文字形式顯示動態,這裡需要註意的是根據文字內容和圖片的張數計算當前Cell的高度,趣配音就是正常的串列顯示。
下麵貼一個計算動態釋出距當前時間的程式碼
    //MARK: -根據後臺時間戳傳回幾分鐘前,幾小時前,幾天前
    func updateTimeToCurrennTime(timeStamp: Double) -> String {
        //獲取當前的時間戳
        let currentTime = Date().timeIntervalSince1970
        //時間戳為毫秒級要 / 1000, 秒就不用除1000,引數帶沒帶000
        let timeSta:TimeInterval = TimeInterval(timeStamp / 1000)
        //時間差
        let reduceTime : TimeInterval = currentTime - timeSta
        //時間差小於60秒
        if reduceTime 60 {
            return "剛剛"
        }
        //時間差大於一分鐘小於60分鐘內
        let mins = Int(reduceTime / 60)
        if mins 60 {
            return "(mins)分鐘前"
        }
        //時間差大於一小時小於24小時內
        let hours = Int(reduceTime / 3600)
        if hours 24 {
            return "(hours)小時前"
        }
        //時間差大於一天小於30天內
        let days = Int(reduceTime / 3600 / 24)
        if days 30 {
            return "(days)天前"
        }
        //不滿足上述條件---或者是未來日期-----直接傳回日期
        let date = NSDate(timeIntervalSince1970: timeSta)
        let dfmatter = DateFormatter()
        //yyyy-MM-dd HH:mm:ss
        dfmatter.dateFormat="yyyy年MM月dd日 HH:mm:ss"
        return dfmatter.string(from: date as Date)
    }

我的模組分析:
我的介面在這裡被劃分為了三個模組,頂部的頭像、名稱、粉絲等一類個人資訊作為TableView的HeaderView,並且在該HeaderView中迴圈建立了已購、優惠券等按鈕,然後是Section0迴圈建立錄音、直播等按鈕,下麵的Cell根據dataSource進行分割槽顯示及每個分割槽的count。在我的介面中使用了兩個小動畫,一個是上下滾動的優惠券引導領取動畫,另一個是我要錄音一個波狀擴散提示錄音動畫。
下麵貼一下波紋擴散動畫的程式碼
import UIKit

class CVLayerView: UIView {
    var pulseLayer : CAShapeLayer!  //定義圖層

    override init(frame: CGRect) {
        super.init(frame: frame)
        let width = self.bounds.size.width

        // 動畫圖層
        pulseLayer = CAShapeLayer()
        pulseLayer.bounds = CGRect(x: 0, y: 0, width: width, height: width)
        pulseLayer.position = CGPoint(x: width/2, y: width/2)
        pulseLayer.backgroundColor = UIColor.clear.cgColor
        // 用BezierPath畫一個原型
        pulseLayer.path = UIBezierPath(ovalIn: pulseLayer.bounds).cgPath
        // 脈衝效果的顏色  (註釋*1)
        pulseLayer.fillColor = UIColor.init(r: 213, g: 54, b: 13).cgColor
        pulseLayer.opacity = 0.0

        // 關鍵程式碼
        let replicatorLayer = CAReplicatorLayer()
        replicatorLayer.bounds = CGRect(x: 0, y: 0, width: width, height: width)
        replicatorLayer.position = CGPoint(x: width/2, y: width/2)
        replicatorLayer.instanceCount = 3  // 三個複製圖層
        replicatorLayer.instanceDelay = 1  // 頻率
        replicatorLayer.addSublayer(pulseLayer)
        self.layer.addSublayer(replicatorLayer)
        self.layer.insertSublayer(replicatorLayer, at: 0)
    }

    func starAnimation() {
        // 透明
        let opacityAnimation = CABasicAnimation(keyPath: "opacity")
        opacityAnimation.fromValue = 1.0  // 起始值
        opacityAnimation.toValue = 0     // 結束值

        // 擴散動畫
        let scaleAnimation = CABasicAnimation(keyPath: "transform")
        let t = CATransform3DIdentity
        scaleAnimation.fromValue = NSValue(caTransform3D: CATransform3DScale(t, 0.0, 0.0, 0.0))
        scaleAnimation.toValue = NSValue(caTransform3D: CATransform3DScale(t, 1.0, 1.0, 0.0))

        // 給CAShapeLayer新增組合動畫
        let groupAnimation = CAAnimationGroup()
        groupAnimation.animations = [opacityAnimation,scaleAnimation]
        groupAnimation.duration = 3   //持續時間
        groupAnimation.autoreverses = false //迴圈效果
        groupAnimation.repeatCount = HUGE
        groupAnimation.isRemovedOnCompletion = false
        pulseLayer.add(groupAnimation, forKey: nil)
    }
    required init?(coder aDecoder: NSCoder) {
        super.init(coder: aDecoder)
    }
}


播放模組分析:
播放模組可以說是整個專案主線的終點,前面模組點選跳轉進入具體節目介面,主頁面頂部為自定義HeaderView,主要顯示該有聲讀物的一些介紹,背景為毛玻璃虛化,下麵為使用LTScrollView管理三個子模組的滾動檢視,簡介為對讀物和作者的介紹,節目串列為該讀物分章節顯示,找相似為與此相似的讀物,圈子為讀者分享圈幾個子模組都是簡單的串列顯示,子模組非固定是根據介面傳回資料決定有哪些子模組。
點選節目串列任一Cell就跳轉到播放詳情介面,該介面採用分割槽CollectionCell,頂部Cell為整體的音訊播放及控制,因為要實時播放音訊所以沒有使用AVFoudtion,該框架需要先快取本地在進行播放,而是使用的三方開源的Streaming庫來線上播放音訊,剩下的為作者發言和評論等。

總結:
目前專案中主要模組的介面和功能基本完成,寫法也都是比較簡單的寫法,專案用時很短,目前一些功能模組使用了第三方。接下來1、準備替換為自己封裝的控制元件2、把專案中可以復用的部分抽離出來封裝為靈活多用的公共元件3、對當前模組進行一些Bug修改和當前功能完善。在這件事情完成之後準備對整體程式碼進行Review,之後進行接下來功能模組的仿寫。
最後:
感興趣的朋友可以到GitHub:https://github.com/daomoer/XMLYFM
下載原始碼看看,也請多提意見,喜歡的朋友動動小手給點個Star✨✨
