網上這部分的文章和資料很多,有一篇非常不錯的文章(《Net Core 基於Ocelot+IdentityServer4+Eureka的搭建高效能閘道器介紹》),也介紹了這個內容,我也是參考了其中的某些步驟,一步一步演練下來,感覺.NET Core在微服務生態方面也是越來越成熟,功能也越來越強大。因此,我也撰寫記錄一下整個步驟,透過Step by Step的形式,加上一些註解,以及對於一些遇到的坑的描述,將整個實踐過程記錄下來,以便幫到有需要的讀者,也為自己的學習做個記錄。我不會再在概念性的問題上多費筆墨,比如什麼是API閘道器、Ocelot、IdentityServer4、Eureka又是什麼之類的問題,我不會做過多的說明,我會爭取用最簡單快捷的方式,將相關的實踐內容描述清楚,雖然本文的標題後面加了一個“(一)”的字樣,代表還會有後續的文章,因為我覺得一篇估計講不完。
案例場景
在我之前寫的《.NET Core中Ocelot的使用》系列文章中,我設計了一個場景,同時涉及了兩個微服務的RESTful API,當時使用兩個微服務,不僅是為了介紹API閘道器的主要功能,而且還引入了服務發現的內容,因此,使用兩個微服務來演示會比較合理。當然,今天我們已經學習過API閘道器和服務發現的基本知識了,我就進一步將案例場景簡化,我們只做一個API:Countries API,在這個API中,會有兩個API端點(API Endpoint):
- GET /api/countries:獲取世界上所有國家的名稱(Name)以及它們的程式碼(Code)
- GET /api/countries/{code}:透過國家程式碼,獲取國家的資訊
當這兩個API被呼叫時,會從countries.json檔案中讀入資料並傳回結果。countries.json檔案的內容大致如下:
|
1
2
3
4
5
6
7
8
9
10
11
|
[ { "name": "Afghanistan", "code": "AF" }, { "name": "Albania", "code": "AL" } // ......] |
非常簡單。下麵我們就一步步地實現整個微服務閘道器的基礎架構。
Step 1:實現Countries API
新建ASP.NET Core API應用程式,在Linux或者MacOS下,可以使用dotnet new命令列建立,在Windows下,也可以使用Visual Studio自帶的專案模板(需要安裝ASP.NET Core Workload)建立。然後新建Countries控制器,程式碼如下:
|
1
2
3
4
5
6
7
8
9
10
11
12
13
14
15
16
17
|
[Route("api/[controller]")][ApiController]public class CountriesController : ControllerBase{ private readonly ILogger logger; public CountriesController(ILogger logger) => this.logger = logger; private static readonly Lazy> countries = new Lazy>(() => JsonConvert.DeserializeObject>(System.IO.File.ReadAllText("countries.json"))); [HttpGet] public IEnumerable Get() => countries.Value; [HttpGet("{code}")] public IEnumerable GetByCode(string code) => countries.Value.Where(c => string.Equals(c.Code, code, StringComparison.InvariantCultureIgnoreCase));} |
按需設定launchSettings.json檔案,設定偵聽埠和啟動方式。這裡我選擇命令列方式,偵聽5001埠,啟動專案,使用curl對API進行測試:

Step 2:使用Identity Server 4提供認證服務
新建一個新的ASP.NET Core MVC應用程式,將其作為API的認證機構(Authentication Authority)。你也可以根據需要使用ASP.NET Core API或者空的ASP.NET Core專案作為基礎來開發這個認證機構服務,不過為了今後的進一步介紹,我這裡選擇MVC作為專案模板。在這個專案中,新增對IdentityServer4這一NuGet包的依賴,然後對Startup.cs進行以下修改。
首先,在Startup.cs中加入如下方法,對API資源、訪問API的客戶端以及認證資源進行配置:
|
1
2
3
4
5
6
7
8
9
10
11
12
13
14
15
16
17
18
19
20
21
22
23
24
25
26
27
|
private static IEnumerable GetApis() => new[] { new ApiResource("country_code_api", "Country Code API") };private static IEnumerable GetClients() => new[] { new Client { ClientId = "country_api_client", AllowedGrantTypes = GrantTypes.ClientCredentials, ClientSecrets = { new Secret("abcdef".Sha256()) }, AllowedScopes = { "country_code_api" } } };private static IEnumerable GetIdentityResources() => new IdentityResource[] { new IdentityResources.OpenId(), new IdentityResources.Profile() }; |
然後,在ConfigureServices方法中,加入對Identity Server 4的配置:
|
1
2
3
4
5
6
7
8
9
10
11
12
13
14
15
16
17
18
|
public void ConfigureServices(IServiceCollection services){ services.Configure(options => { // This lambda determines whether user consent for non-essential cookies is needed for a given request. options.CheckConsentNeeded = context => true; options.MinimumSameSitePolicy = SameSiteMode.None; }); services.AddIdentityServer() .AddDeveloperSigningCredential() .AddInMemoryIdentityResources(GetIdentityResources()) .AddInMemoryApiResources(GetApis()) .AddInMemoryClients(GetClients()); services.AddMvc().SetCompatibilityVersion(CompatibilityVersion.Version_2_2);} |
最後,在Configure方法中,啟用Identity Server 4:
|
1
2
3
4
5
6
7
8
9
10
11
12
13
14
15
16
|
public void Configure(IApplicationBuilder app, IHostingEnvironment env){ if (env.IsDevelopment()) { app.UseDeveloperExceptionPage(); } else { app.UseExceptionHandler("/Error"); } app.UseStaticFiles(); app.UseCookiePolicy(); app.UseIdentityServer(); app.UseMvc();} |
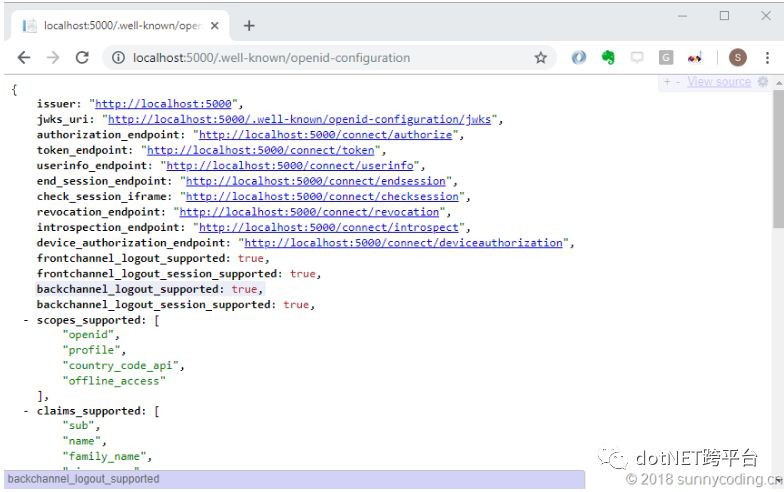
同樣,根據需要修改launchSettings.json檔案,然後啟動該專案,可以透過http://localhost:5000/.well-known/openid-configuration這一端點來獲得OpenID配置的元資料:
Step 3:使用Identity Server 4認證服務對API訪問進行身份認證
接下來,修改Countries API,使其使用上面的Identity Server進行API訪問認證。修改Countries API專案的Startup.cs檔案中的ConfigureServices和Configure方法,加入以下程式碼:
|
1
2
3
4
5
6
7
8
9
10
11
12
13
14
15
16
17
18
19
20
21
|
public void ConfigureServices(IServiceCollection services){ services.AddMvc().SetCompatibilityVersion(CompatibilityVersion.Version_2_2); services.AddAuthentication("Bearer") .AddJwtBearer("Bearer", options => { options.Authority = "http://localhost:5000"; options.RequireHttpsMetadata = false; options.Audience = "country_code_api"; });}public void Configure(IApplicationBuilder app, IHostingEnvironment env){ if (env.IsDevelopment()) { app.UseDeveloperExceptionPage(); } app.UseAuthentication(); app.UseMvc();} |
在上面的方法中,透過options.Authority屬性設定認證機構為我們的Identity Server的地址,然後再在ContriesController上新增Authorize特性,表示Controller需要身份認證:
|
1
2
3
4
5
6
7
|
[Route("api/[controller]")][ApiController][Authorize]public class CountriesController : ControllerBase{ // ...} |
此時啟動Identity Server,然後重啟Contries API專案,再次使用curl測試,發現請求已經傳回401 Unauthorized狀態:

因為我們沒有提供任何Access Token,所以也就無法訪問Countries API。目前我們使用的訪問方式還是最簡單的Client Credentials,後面我們會使用Password的方式來改造我們的認證形式,以實現使用者註冊、認證等應用場景。現在,我們新建一個控制檯應用程式,在這個控制檯應用程式上,新增IdentityModel的NuGet依賴項,然後使用下麵的程式碼訪問Countries API:
|
1
2
3
4
5
6
7
8
9
10
11
12
13
14
15
16
17
18
19
20
21
22
23
24
25
26
27
28
29
30
31
32
33
34
35
36
37
38
39
|
static async Task Main(string[] args){ using (var client = new HttpClient()) { // IdentityModel為HttpClient提供了基於認證模型的API擴充套件 // 獲取Access Token var discoResponse = await client.GetDiscoveryDocumentAsync("http://localhost:5000"); if (discoResponse.IsError) { Console.WriteLine(discoResponse.Error); return; } var tokenResponse = await client.RequestClientCredentialsTokenAsync(new ClientCredentialsTokenRequest { Address = discoResponse.TokenEndpoint, ClientId = "country_api_client", ClientSecret = "abcdef", Scope = "country_code_api" }); if (tokenResponse.IsError) { Console.WriteLine(tokenResponse.Error); return; } // 輸出獲取Access Token的API傳回結果 Console.WriteLine(tokenResponse.Json); // 在HttpClient上設定Access Token client.SetBearerToken(tokenResponse.AccessToken); // 呼叫API並傳回結果 var response = await client.GetAsync("http://localhost:5001/api/countries/cn"); Console.WriteLine(response.IsSuccessStatusCode ? $"{response.StatusCode} {await response.Content.ReadAsStringAsync()}" : response.StatusCode.ToString()); }} |
執行後可以看到,程式可以輸出正確結果:

小結
本文以最快速的方式展示瞭如何讓ASP.NET Core Web API基於Identity Server 4實現身份認證,我們暫時還沒有引入Ocelot API閘道器,也沒有引入API訪問授權、使用者註冊與登入等等內容,這些都會在後續文章中一步步介紹。由於牽涉的內容真的非常多,文章沒有辦法把所有細節內容一一解釋完整,因此如果在閱讀上存在疑惑,請在文章下方留言,我會一一回覆。下一講會介紹如何在Ocelot API閘道器上整合Identity Server 4的認證服務。
以下是本文所描述的場景的UML時序圖,供參考:

原文地址:http://sunnycoding.cn/2019/02/14/microservices-with-ocelot-id4-and-eureka-part1
.NET社群新聞,深度好文,歡迎訪問公眾號文章彙總 http://www.csharpkit.com 

