

-
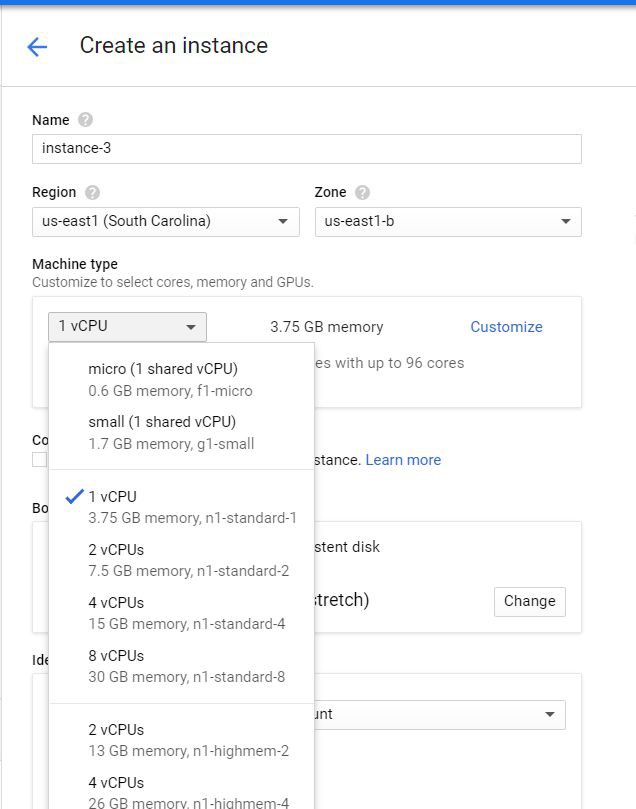
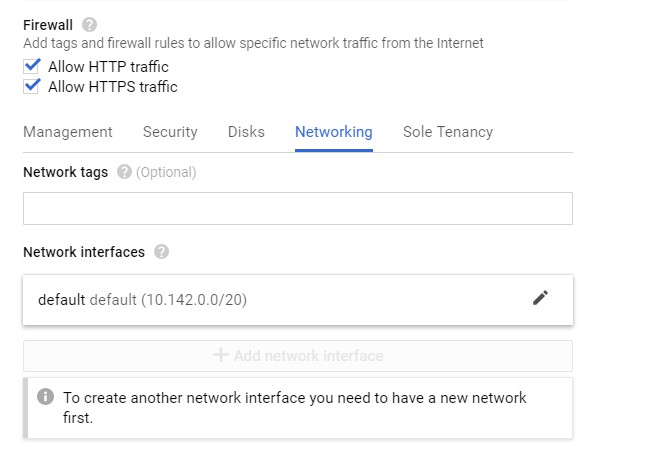
在Google Cloud上建立使用者
-
使用Keras/Flask/Docker搭建一個REST API的機器學習模型服務
-
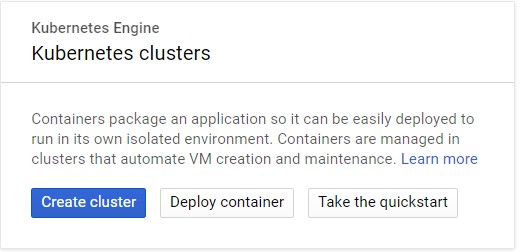
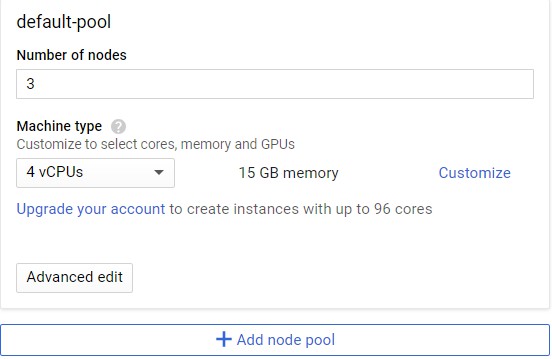
用Kubernetes部署上述模型
-
enjoy it


sudo yum remove docker docker-client docker-client-latest docker-common docker-latest docker-latest-logrotate docker-logrotate docker-selinux docker-engine-selinux docker-engine
sudo yum install -y yum-utils device-mapper-persistent-data lvm2sudo yum-config-manager — add-repo https://download.docker.com/linux/centos/docker-ce.reposudo yum install docker-ce
sudo systemctl start dockersudo docker run hello-world
Hello from Docker!This message shows that your installation appears to be working correctly.To generate this message, Docker took the following steps: 1. The Docker client contacted the Docker daemon. 2. The Docker daemon pulled the "hello-world" image from the Docker Hub. (amd64) 3. The Docker daemon created a new container from that image which runs the executable that produces the output you are currently reading. 4. The Docker daemon streamed that output to the Docker client, which sent it to your terminal
這裡會借用Adrian Rosebrock的一個指令碼,他提供了使用Keras的深度學習模型並透過Flask提供服務的教程,可以從這裡[1]訪問。
global graphgraph = tf.get_default_graph()...with graph.as_default():preds = model.predict(image)
mkdir keras-appcd keras-app
# USAGE# Start the server:# python app.py# Submit a request via cURL:# curl -X POST -F image=@dog.jpg 'http://localhost:5000/predict'# import the necessary packagesfrom keras.applications import ResNet50from keras.preprocessing.image import img_to_arrayfrom keras.applications import imagenet_utilsfrom PIL import Imageimport numpy as npimport flaskimport ioimport tensorflow as tf# initialize our Flask application and the Keras modelapp = flask.Flask(__name__)model = Nonedef load_model():# load the pre-trained Keras model (here we are using a model# pre-trained on ImageNet and provided by Keras, but you can# substitute in your own networks just as easily)global modelmodel = ResNet50(weights="imagenet")global graphgraph = tf.get_default_graph()def prepare_image(image, target):# if the image mode is not RGB, convert itif image.mode != "RGB":image = image.convert("RGB")# resize the input image and preprocess itimage = image.resize(target)image = img_to_array(image)image = np.expand_dims(image, axis=0)image = imagenet_utils.preprocess_input(image)# return the processed imagereturn image@app.route("/predict", methods=["POST"])def predict():# initialize the data dictionary that will be returned from the# viewdata = {"success": False}# ensure an image was properly uploaded to our endpointif flask.request.method == "POST":if flask.request.files.get("image"):# read the image in PIL formatimage = flask.request.files["image"].read()image = Image.open(io.BytesIO(image))# preprocess the image and prepare it for classificationimage = prepare_image(image, target=(224, 224))# classify the input image and then initialize the list# of predictions to return to the clientwith graph.as_default():preds = model.predict(image)results = imagenet_utils.decode_predictions(preds)data["predictions"] = []# loop over the results and add them to the list of# returned predictionsfor (imagenetID, label, prob) in results[0]:r = {"label": label, "probability": float(prob)}data["predictions"].append(r)# indicate that the request was a successdata["success"] = True# return the data dictionary as a JSON responsereturn flask.jsonify(data)# if this is the main thread of execution first load the model and# then start the serverif __name__ == "__main__":print(("* Loading Keras model and Flask starting server...""please wait until server has fully started"))load_model()app.run(host='0.0.0.0')
kerastensorflowflaskgeventpillowrequests
FROM python:3.6WORKDIR /appCOPY requirements.txt /appRUN pip install -r ./requirements.txtCOPY app.py /appCMD ["python", "app.py"]~
sudo docker build -t keras-app:latest .
sudo docker run -d -p 5000:5000 keras-app
[gustafcavanaugh@instance-3 ~]$ sudo docker ps -aCONTAINER ID IMAGE COMMAND CREATED STATUS PORTS NAMESd82f65802166 keras-app "python app.py" About an hour ago Up About an hour 0.0.0.0:5000->5000/tcp nervous_northcutt

curl -X POST -F image=@dog.jpg 'http://localhost:5000/predict'
{"predictions":[{"label":"beagle","probability":0.987775444984436},{"label":"pot","probability":0.0020967808086425066},{"label":"Cardigan","probability":0.001351703773252666},{"label":"Walker_hound","probability":0.0012711131712421775},{"label":"Brittany_spaniel","probability":0.0010085132671520114}],"success":true}
Login Succeeded
REPOSITORY TAG IMAGE ID CREATED SIZE keras-app latest ddb507b8a017 About an hour ago 1.61GB
#Formatsudo docker tag <your image id> <your docker hub id>/<app name>#My Exact Command - Make Sure To Use Your Inputssudo docker tag ddb507b8a017 gcav66/keras-app
#Formatsudo docker push <your docker hub name>/<app-name>#My exact commandsudo docker push gcav66/keras-app


kubectl run keras-app --image=gcav66/keras-app --port 5000
gustafcavanaugh@cloudshell:~ (basic-web-app-test)$ kubectl get podsNAME READY STATUS RESTARTS AGEkeras-app-79568b5f57-5qxqk 1/1 Running 0 1m
kubectl expose deployment keras-app --type=LoadBalancer --port 80 --target-port 5000
gustafcavanaugh@cloudshell:~ (basic-web-app-test)$ kubectl get serviceNAME TYPE CLUSTER-IP EXTERNAL-IP PORT(S) AGEkeras-app LoadBalancer 10.11.250.71 35.225.226.94 80:30271/TCP 4mkubernetes ClusterIP 10.11.240.1 443/TCP 18m
$ curl -X POST -F image=@dog.jpg 'http://35.225.226.94/predict'{"predictions":[{"label":"beagle","probability":0.987775444984436},{"label":"pot","probability":0.0020967808086425066},{"label":"Cardigan","probability":0.001351703773252666},{"label":"Walker_hound","probability":0.0012711131712421775},{"label":"Brittany_spaniel","probability":0.0010085132671520114}],"success":true}
-
https://blog.keras.io/building-a-simple-keras-deep-learning-rest-api.html
-
https://github.com/tensorflow/tensorflow/issues/14356


