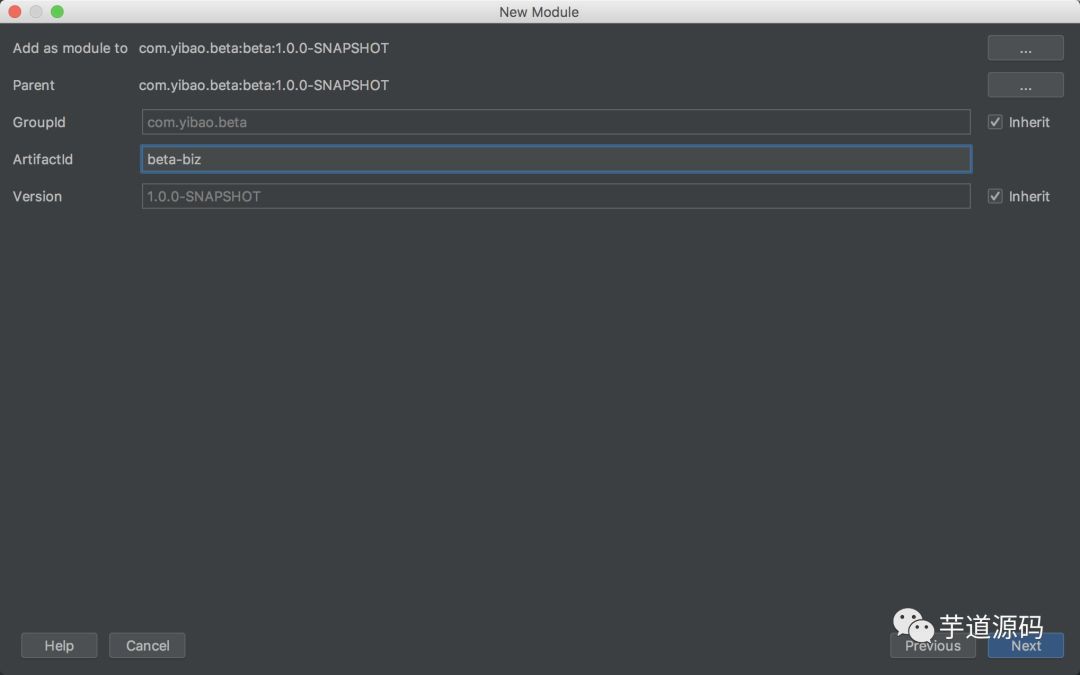
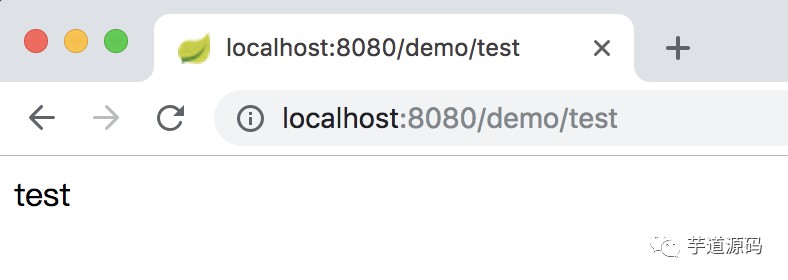
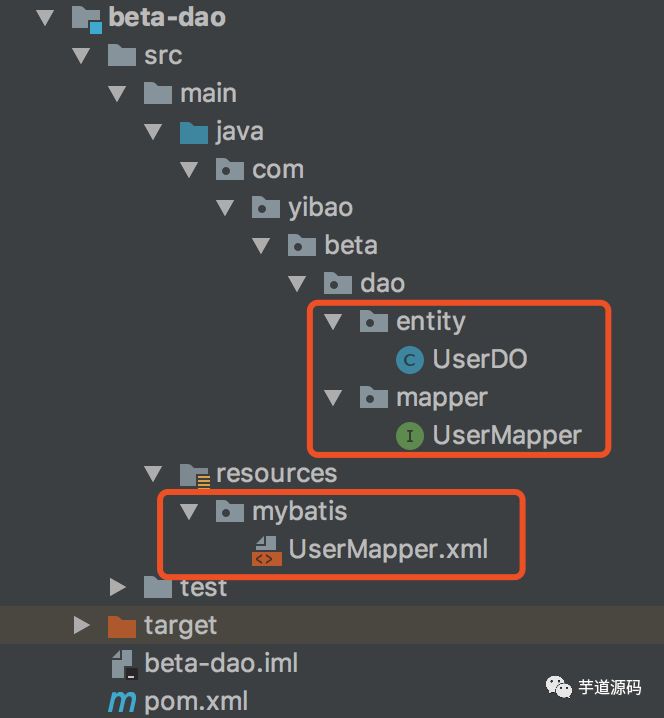
最近公司專案準備開始重構,框架選定為SpringBoot+Mybatis,本篇主要記錄了在IDEA中搭建SpringBoot多模組專案的過程。 ① IDEA 工具欄選擇選單 File -> New -> Project… ② 選擇Spring Initializr,Initializr預設選擇Default,點選Next ③ 填寫輸入框,點選Next ④ 這步不需要選擇直接點Next ⑤ 點選Finish建立專案 ⑥ 最終得到的專案目錄結構如下 ⑦ 刪除無用的.mvn目錄、src目錄、mvnw及mvnw.cmd檔案,最終只留.gitignore和pom.xml ① 選擇專案根目錄beta右鍵撥出選單,選擇New -> Module ② 選擇Maven,點選Next ③ 填寫ArifactId,點選Next ④ 修改Module name增加橫槓提升可讀性,點選Finish ⑤ 同理新增【beta-dao】、【beta-web】子模組,最終得到專案目錄結構如下圖 ① 在beta-web層建立com.yibao.beta.web包(註意:這是多層目錄結構並非單個目錄名,com >> yibao >> beta >> web)並新增入口類BetaWebApplication.java ② 在com.yibao.beta.web包中新增controller目錄並新建一個controller,新增test方法測試介面是否可以正常訪問 ③ 執行BetaWebApplication類中的main方法啟動專案,預設埠為8080,訪問http://localhost:8080/demo/test得到如下效果 以上雖然專案能正常啟動,但是模組間的依賴關係卻還未新增,下麵繼續完善 各個子模組的依賴關係:biz層依賴dao層,web層依賴biz層 ① 父pom檔案中宣告所有子模組依賴(dependencyManagement及dependencies的區別自行查閱檔案)
一、前言
1、開發工具及系統環境
2、專案目錄結構
二、搭建步驟
1、建立父工程


2、建立子模組


3、執行專案
package com.yibao.beta.web;
import org.springframework.boot.SpringApplication;
import org.springframework.boot.autoconfigure.SpringBootApplication;

/**
 * @author linjian
 * @date 2018/9/29
 */
@SpringBootApplication
public class BetaWebApplication {

    public static void main(String[] args) {
        SpringApplication.run(BetaWebApplication.class, args);
    }
}
package com.yibao.beta.web.controller;

import org.springframework.web.bind.annotation.GetMapping;
import org.springframework.web.bind.annotation.RequestMapping;
import org.springframework.web.bind.annotation.RestController;

/**
 * @author linjian
 * @date 2018/9/29
 */
@RestController
@RequestMapping("demo")
public class DemoController {

    @GetMapping("test")
    public String test() {
        return "Hello World!";
    }
}

4、配置模組間的依賴關係
<dependencyManagement>
    <dependencies>
        <dependency>
            <groupId>com.yibao.betagroupId>
<artifactId>beta-bizartifactId>
<version>${beta.version}version>
dependency>
<dependency>
<groupId>com.yibao.betagroupId>
<artifactId>beta-daoartifactId>
<version>${beta.version}version>
dependency>
<dependency>
<groupId>com.yibao.betagroupId>
<artifactId>beta-webartifactId>
<version>${beta.version}version>
dependency>
dependencies>
dependencyManagement>
其中${beta.version}定義在properties標簽中
② 在beta-web層中的pom檔案中新增beta-biz依賴
<dependencies>
    <dependency>
<groupId>com.yibao.betagroupId><artifactId>beta-bizartifactId>
dependency>
dependencies>
③ 在beta-biz層中的pom檔案中新增beta-dao依賴
<dependencies>
    <dependency>
<groupId>com.yibao.betagroupId><artifactId>beta-daoartifactId>
dependency>
dependencies>
5、web層呼叫biz層介面測試
① 在beta-biz層建立com.yibao.beta.biz包,新增service目錄併在其中建立DemoService介面類
package com.yibao.beta.biz.service;

/**
 * @author linjian
 * @date 2018/9/29
 */
public interface DemoService {

    String test();
}
package com.yibao.beta.biz.service.impl;

import com.yibao.beta.biz.service.DemoService;
import org.springframework.stereotype.Service;

/**
 * @author linjian
 * @date 2018/9/29
 */
@Service
public class DemoServiceImpl implements DemoService {

    @Override
    public String test() {
        return "test";
    }
}
② DemoController透過@Autowired註解註入DemoService,修改DemoController的test方法使之呼叫DemoService的test方法,最終如下所示
package com.yibao.beta.web.controller;

import com.yibao.beta.biz.service.DemoService;
import org.springframework.beans.factory.annotation.Autowired;
import org.springframework.web.bind.annotation.GetMapping;
import org.springframework.web.bind.annotation.RequestMapping;
import org.springframework.web.bind.annotation.RestController;

/**
 * @author linjian
 * @date 2018/9/29
 */
@RestController
@RequestMapping("demo")
public class DemoController {

    @Autowired
    private DemoService demoService;

    @GetMapping("test")
    public String test() {
        return demoService.test();
    }
}
③ 再次執行BetaWebApplication類中的main方法啟動專案,發現如下報錯
***************************
APPLICATION FAILED TO START
***************************

Description:

Field demoService in com.yibao.beta.web.controller.DemoController required a bean of type 'com.yibao.beta.biz.service.DemoService' that could not be found.


Action:

Consider defining a bean of type 'com.yibao.beta.biz.service.DemoService' in your configuration.
原因是找不到DemoService類,此時需要在BetaWebApplication入口類中增加包掃描,設定@SpringBootApplication註解中的scanBasePackages值為com.yibao.beta,最終如下所示
package com.yibao.beta.web;

import org.mybatis.spring.annotation.MapperScan;
import org.springframework.boot.SpringApplication;
import org.springframework.boot.autoconfigure.SpringBootApplication;

/**
 * @author linjian
 * @date 2018/9/29
 */
@SpringBootApplication(scanBasePackages = "com.yibao.beta")
@MapperScan("com.yibao.beta.dao.mapper")
public class BetaWebApplication {

    public static void main(String[] args) {
        SpringApplication.run(BetaWebApplication.class, args);
    }
}
設定完後重新執行main方法,專案正常啟動,訪問http://localhost:8080/demo/test得到如下效果

6、整合Mybatis
① 父pom檔案中宣告mybatis-spring-boot-starter及lombok依賴
dependencyManagement>
    <dependencies>
        <dependency>
<groupId>org.mybatis.spring.bootgroupId><artifactId>mybatis-spring-boot-starterartifactId>
<version>1.3.2version>
dependency>
<dependency>
<groupId>org.projectlombokgroupId>
<artifactId>lombokartifactId>
<version>1.16.22version>
dependency>
dependencies>
dependencyManagement>
② 在beta-dao層中的pom檔案中新增上述依賴
<dependencies>
    <dependency>
<groupId>org.mybatis.spring.bootgroupId><artifactId>mybatis-spring-boot-starterartifactId>
dependency>
<dependency>
<groupId>mysqlgroupId>
<artifactId>mysql-connector-javaartifactId>
dependency>
<dependency>
<groupId>org.projectlombokgroupId>
<artifactId>lombokartifactId>
dependency>
dependencies>
③ 在beta-dao層建立com.yibao.beta.dao包,透過mybatis-genertaor工具生成dao層相關檔案(DO、Mapper、xml),存放目錄如下

④ applicatio.properties檔案新增jdbc及mybatis相應配置項
spring.datasource.driverClassName = com.mysql.jdbc.Driver
spring.datasource.url = jdbc:mysql://192.168.1.1/test?useUnicode=true&characterEncoding;=utf-8
spring.datasource.username = test
spring.datasource.password = 123456

mybatis.mapper-locations = classpath:mybatis/*.xml
mybatis.type-aliases-package = com.yibao.beta.dao.entity
⑤ DemoService透過@Autowired註解註入UserMapper,修改DemoService的test方法使之呼叫UserMapper的selectByPrimaryKey方法,最終如下所示
package com.yibao.beta.biz.service.impl;

import com.yibao.beta.biz.service.DemoService;
import com.yibao.beta.dao.entity.UserDO;
import com.yibao.beta.dao.mapper.UserMapper;
import org.springframework.beans.factory.annotation.Autowired;
import org.springframework.stereotype.Service;

/**
 * @author linjian
 * @date 2018/9/29
 */
@Service
public class DemoServiceImpl implements DemoService {

    @Autowired
    private UserMapper userMapper;

    @Override
    public String test() {
        UserDO user = userMapper.selectByPrimaryKey(1);
        return user.toString();
    }
}
⑥ 再次執行BetaWebApplication類中的main方法啟動專案,發現如下報錯
APPLICATION FAILED TO START
***************************

Description:

Field userMapper in com.yibao.beta.biz.service.impl.DemoServiceImpl required a bean of type 'com.yibao.beta.dao.mapper.UserMapper' that could not be found.


Action:

Consider defining a bean of type 'com.yibao.beta.dao.mapper.UserMapper' in your configuration.
原因是找不到UserMapper類,此時需要在BetaWebApplication入口類中增加dao層包掃描,新增@MapperScan註解並設定其值為com.yibao.beta.dao.mapper,最終如下所示
package com.yibao.beta.web;

import org.mybatis.spring.annotation.MapperScan;
import org.springframework.boot.SpringApplication;
import org.springframework.boot.autoconfigure.SpringBootApplication;

/**
 * @author linjian
 * @date 2018/9/29
 */
@SpringBootApplication(scanBasePackages = "com.yibao.beta")
@MapperScan("com.yibao.beta.dao.mapper")
public class BetaWebApplication {

    public static void main(String[] args) {
        SpringApplication.run(BetaWebApplication.class, args);
    }
}
設定完後重新執行main方法,專案正常啟動,訪問http://localhost:8080/demo/test得到如下效果

至此,一個簡單的SpringBoot+Mybatis多模組專案已經搭建完畢,我們也透過啟動專案呼叫介面驗證其正確性。
四、總結
一個層次分明的多模組工程結構不僅方便維護,而且有利於後續微服務化。在此結構的基礎上還可以擴充套件common層(公共元件)、server層(如dubbo對外提供的服務)
此為專案重構的第一步,後續還會的框架中整合logback、disconf、redis、dubbo等元件
五、未提到的坑
在搭建過程中還遇到一個maven私服的問題,原因是公司內部的maven私服配置的中央倉庫為阿裡的遠端倉庫,它與maven自帶的遠端倉庫相比有些jar包版本並不全,導致在搭建過程中好幾次因為沒拉到相應jar包導致專案啟動不了。
 知識星球
知識星球


朋友會在“發現-看一看”看到你“在看”的內容