(點選上方公眾號,可快速關註)
來源:袁鳴凱 ,
blog.csdn.net/lifetragedy/article/details/7776907
一、Axis2簡介
1.1 介紹Axis2
Axis框架來自 Apache 開放原始碼組織,它是基於JAVA語言的最新的 SOAP 規範(SOAP 1.2)和 SOAP withAttachments 規範(來自 Apache Group )的開放原始碼實現。有很多流行的開發工具都使用AXIS作為其實現支援Web服務的功能,例如JBuilder以及著名的Eclipse J2EE外掛Lomboz。AXIS的最新版本可以從 http://ws.apache.org/axis/index.html下載。
下載下來後直接解壓即可用了。下圖是AXIS核心引擎的體系結構圖:

整個AXIS專案包括以下幾個部分:
訊息流子系統
訊息流子系統提供了靈活的訊息傳遞框架,這個訊息傳遞框架包括處理程式、鏈、序列化程式和反序列化程式。處理程式是一個處理請求、響應和故障流的物件。處理程式可被組合在一起成為鏈,而且可以使用一個靈活的部署描述符來配置這些處理程式的順序。
傳輸框架子系統
提供了一個傳輸框架,這個傳輸框架可以幫助您建立自己的可插式傳輸傳送器和傳輸偵聽器。
資料編碼子系統
AXIS完全按照 XML Schema 規範提供各種資料型別的自動序列化,並且提供功能擴充套件介面來使用您自己定製的序列化器和反序列化器。
其他
AXIS完全支援 WSDL 以及日誌記錄、出錯以及故障處理機制。它同時提供一些工具用來講WSDL檔案轉換成客戶端的呼叫框架以及根據類來產生WSDL定義檔案。
AXIS目前版本支援的標準是:W3C SOAP1.1 和 1.2;WSDL 1.1;SAAJ 1.1(SUN公司:SOAP with Attachments API for Java);JAX-RPC(SUN公司:Java APIfor XML-Based RPC)1.0。
1.2 開發專案中如何選擇使用Axis2和其它的WebService
-
如果你的應用程式需要支援多語言即有C++, .net, Java,你應該選擇Axis2。
-
如果應用程式是遵循 Spring 哲學路線的話,ApacheCXF 或者Spring WS是一種更好的選擇,特別對嵌入式的 Web Services 來說。
二、搭建環境
第一步:
開啟Eclipse,建立一個標準的Dynamic Web Project


第二步:
建完工程後,把Axis2-1.4/Axis2-1.4.1解壓開來的目錄下的axis2-web(如下圖),整個拷入你工程的WebContent目錄下:

第三步:
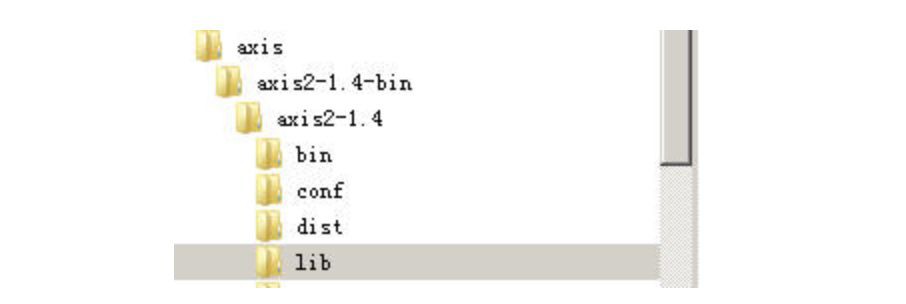
把Axis2-1.4/Axis2-1.4.1解壓開來的目錄下的lib目錄裡的所有jar匯入你工程的WEB-INF/lib目錄下,並載入入工程的classpath,如下圖
第四步:
在工程和src平級處新建一個目錄叫external-lib

第五步:
把tomcat裡的用於jsp, servlet解析的兩個lib拷入此external-lib目錄,並且以“載入外部jar”的方式加入工程的classpath中去

第六步:
在工程的WEB-INF目錄下新建一個目錄叫services目錄。
第七步:
把Axis2-1.4/Axis2-1.4.1解壓開來的目錄下的repository\modules,modules這個目錄,整個複製到你工程的WEB-INF目錄下。
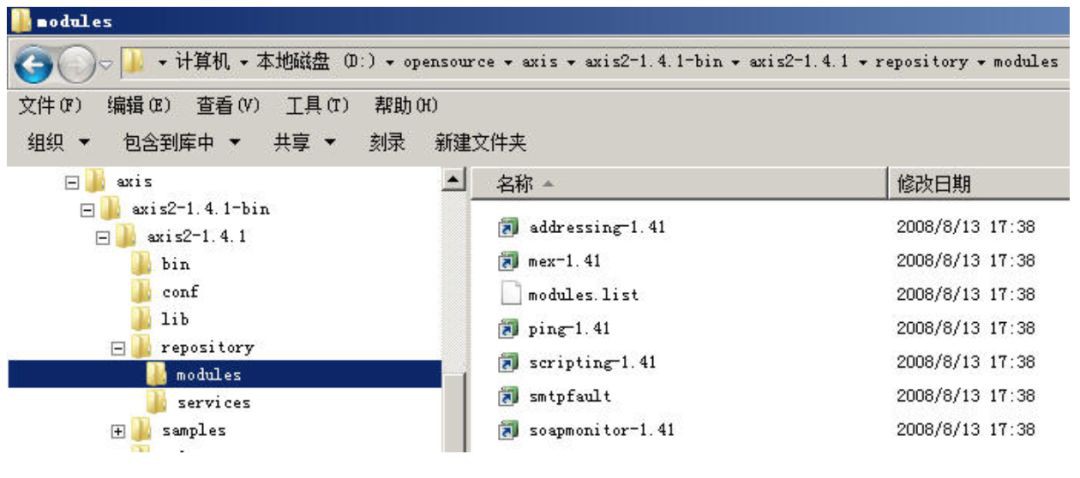
整個配完的工程結構應如下圖所示:

三、第一個Axis2Webservice之HelloWorld
3.1 Service端程式碼
package org.sky.axis2.helloworld;
import org.apache.axiom.om.OMElement;
import org.apache.axis2.AxisFault;
import javax.xml.stream.XMLStreamException;
public class HelloWorld {
public OMElement sayHello(OMElement element) throws XMLStreamException {
element.build();
// Secondly the OMElement should be detached from the current OMTree so
// that it can be attached
// some other OM Tree. Once detached the OmTree will remove its
// connections to this OMElement.
element.detach();
return element;
}
}
3.2 Service端的Web Service佈署檔案
然後我們在工程的WebContent\WEB-INF\services\目錄下新建一個目錄叫HelloWorld的目錄,與我們的類同名,在此目錄下再建立一個META-INF的目錄(大小寫必須完全一致),然後在META-INF目錄下新建一個services.xml,具體目錄結構如下圖所示:

Services.xml檔案的內容如下:
org.sky.axis2.helloworld.HelloWorld
urn:sayHello
該佈署檔案很容易閱讀:
-
它宣告了一個WebService的主類叫” org.sky.axis2.helloworld.HelloWorld”;
-
該WebService有一個Web Service Method,在類中該方法名叫sayHello,它傳回一個OMElement為型別的值,接受一個OMElement為型別的引數;(RawXMLINOutMessageReceiver)
-
sayHello這個對外暴露的WebService方法名為: urn:sayHello
修改web.xml,在裡面加入這些東東:
Apache-Axis Servlet
AxisServlet
org.apache.axis2.transport.http.AxisServlet
3.3 佈署Web Service
在Tomcat的webapps目錄下建立一個目錄叫Axis2Service的目錄

然後將整個工程的WebContent目錄下的所有東西,全複製入這個目錄內,啟動tomcat。
啟動後訪問:http://localhost:8080/Axis2Service/axis2-web/
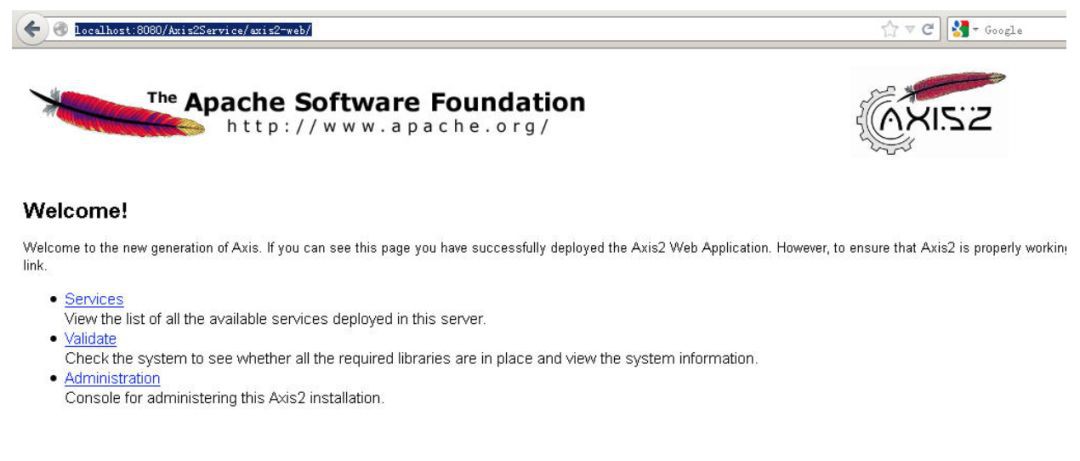
單點:Services這個連結

再點這個HelloWorld連結

我們就可以得到我們的HelloWorld這個WebService的wsdl內容了。
四、四種不同的HelloWorld客戶端
Axis2支援4種型別的客戶端:
Block(阻塞式客戶端)
傳統客戶端
Non block(非阻塞式客戶端)
又被稱為非同步客戶端,傳統客戶端被呼叫後將會被阻塞直到操作完成。這種方式在有很多Web Service需要在一個單一的客戶端應用程式中啟動時很不可取。一種解決方法是使用Non-Blocking API來呼叫這些Web Services。Axis2提供給使用者一種基於回叫機制的non-blocking API。
雙工(雙向傳輸)
以上的機制都使用單一的連線去傳送請求和接收響應.這都明顯在效能上落後於使用兩條連線(單向或雙向)進行進行請求和響應的傳輸 . 因此以上的機制都不能解決長時間執行的交易, 連線將在操作還沒完成就會超時. 一種解決方案是使用分開的兩條傳輸連線來傳輸請求和響應 . 我們叫這種方案為傳輸層非同步。
雙工非阻塞(雙向且非阻塞傳輸)
下麵我們就來看這四個客戶端(此處對於雙工傳輸的客戶端程式碼進行忽略,因為這個寫法很簡單,我們將著重於描述雙工+非阻塞的客戶端例子,網上目前幾乎沒有能夠在axis21.4下真正能夠執行的“雙工且非阻塞”的例子或者是完整程式碼)。
4.1 傳統的客戶端HelloWorldWithReturnClient.java
package org.sky.axis2.helloworld;
import java.util.Iterator;
import javax.xml.namespace.QName;
import org.apache.axiom.om.OMAbstractFactory;
import org.apache.axiom.om.OMElement;
import org.apache.axiom.om.OMFactory;
import org.apache.axiom.om.OMNamespace;
import org.apache.axiom.om.OMNode;
import org.apache.axiom.soap.SOAPBody;
import org.apache.axis2.AxisFault;
import org.apache.axis2.addressing.EndpointReference;
import org.apache.axis2.client.Options;
import org.apache.axis2.client.ServiceClient;
import org.apache.axis2.databinding.utils.BeanUtil;
import org.apache.axis2.engine.DefaultObjectSupplier;
public class HelloWorldWithReturnClient {
private static EndpointReference targetEPR = new EndpointReference(
“http://localhost:8080/Axis2Service/services/HelloWorld”);
public void sayHello() {
Options options = new Options();
options.setAction(“urn:sayHello”);
options.setTo(targetEPR);
ServiceClient sender = null;
try {
sender = new ServiceClient();
sender.setOptions(options);
OMFactory fac = OMAbstractFactory.getOMFactory();
OMNamespace omNs = fac
.createOMNamespace(“http://helloworld.axis2.sky.org”, “”);
OMElement method = fac.createOMElement(“sayHello”, omNs);
OMElement name = fac.createOMElement(“name”, omNs);
name.setText(“ymk”);
method.addChild(name);
method.build();
OMElement response = sender.sendReceive(method);
System.out.println(response);
OMElement element = response.getFirstChildWithName(
new QName(“http://helloworld.axis2.sky.org”, “name”));
System.out.println(element.getText());
} catch (AxisFault e) {
System.out.println(“——Error Occured——“);
e.printStackTrace();
}
}
public static void main(String[] args) {
HelloWorldWithReturnClient testClient = new HelloWorldWithReturnClient();
testClient.sayHello();
}
}
註意我加粗或者是加粗標紅處的程式碼,為核心程式碼。
由於我們使用提Axis2的底層API來呼叫WebService而並不是像傻瓜式的透過一個wsdl生成Web Service呼叫控制代碼,所以我們要對一個WSDL能夠有閱讀能力。
-
Axis2中的Webservice的入口
不是: http://localhost:8080/Axis2Service/services/HelloWorld?wsdl這個哦,而應該是:
http://localhost:8080/Axis2Service/services/HelloWorld,不帶?wsdl。
-
看一個wsdl中的namespace是什麼:

-
看一個wsdl中的web service方法名是什麼

-
看一個wsdl的傳回結果是怎麼樣的格式:
為此我們在程式裡增加了一行:OMElement response =sender.sendReceive(method);
然後直接:System.out.println(response);
這樣,我們可以看到它的傳回為:

根據Axis2的OMElement的解析語法我們就可以直接把這個傳回的值get出來。
我們甚至可以用opensource的SOAP UI這個工具,來直接得到我們的webservice呼叫的傳回值,並以此傳回結果的格式來決定我們如何去解析這個OMElement格式的傳回結果:

在工程上單擊右鍵選“AddWSDL”

在彈出對話方塊中直接把http://localhost:8080/Axis2Service/services/HelloWorld?wsdl加入對方框中的wsdl欄中

點OK生成webservice soap ui呼叫的客戶端如下圖
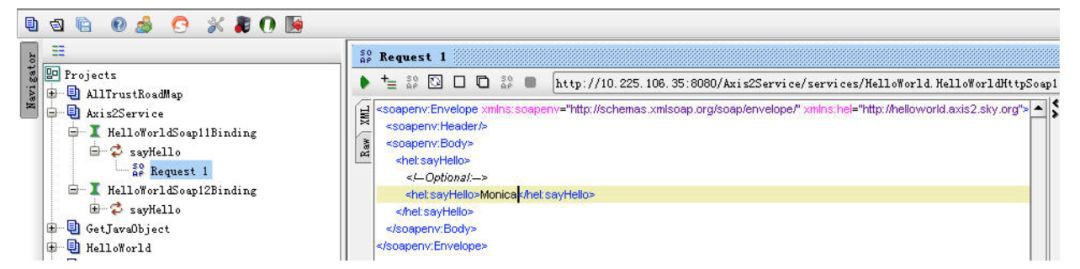
它會生成11Binding和12Binding兩個客戶端,我們把11Binding的節點展開,雙擊Request 1,在右邊會顯示呼叫的soap樣例,在

因此透過SOAP UI我們也可以測試我們的Web Service。
4.2 非阻塞式HelloWorldWithReturnNonBlock.java
與傳統的阻塞式webservice呼叫不同的是,一旦呼叫”serviceClient.sendReceive(payload);”,客戶端將會被阻塞直到操作完成。這種方式在有很多Web Service需要在一個單一的客戶端應用程式中啟動時很不可取。一種解決方法是使用Non-Blocking API來呼叫這些Web Services。Axis2提供給使用者一種基於回叫機制的non-blocking API。
很多網上使用的“回呼”介面都只能在Axis21.3中才能使用,而在Axis21.4中回呼介面已經被升級成一個抽象類叫AxisCallBack類了,因此90%目前網上的關於“非阻塞式”的客戶端的程式碼在Axis2中都是跑不起來的,在eclipse ide中會顯示“該類/方法已經被deprecated(廢棄)”。
因此請註意看筆者的程式碼,先宣告一個用於非阻塞呼叫的回呼(callback)類
HelloWorldNonBlockCB.java
package org.sky.axis2.helloworld;
import java.util.Iterator;
import javax.xml.namespace.QName;
import org.apache.axiom.om.OMElement;
import org.apache.axiom.om.OMNode;
import org.apache.axis2.client.async.AxisCallback;
import org.apache.axis2.context.MessageContext;
import org.apache.axis2.databinding.utils.BeanUtil;
import org.apache.axis2.engine.DefaultObjectSupplier;
public class HelloWorldNonBlockCB implements AxisCallback {
private boolean complete = false;
public void onMessage(MessageContext msgContext) {
System.out.println(msgContext.getEnvelope().getBody());
OMElement element = msgContext.getEnvelope().getBody()
.getFirstElement();
OMElement result = element.getFirstChildWithName(new QName(
“http://helloworld.axis2.sky.org”, “name”));
System.out.println(result.getText());
synchronized (this) {
this.notify();
}
}
public boolean isComplete() {
return complete;
}
public void onFault(MessageContext msgContext) {
System.out.println(msgContext.getEnvelope().getBody().getFault()
.toString());
synchronized (this) {
this.notify();
}
}
public void onError(Exception e) {
e.printStackTrace();
synchronized (this) {
this.notify();
}
}
public void onComplete() {
this.complete = true;
synchronized (this) {
this.notify();
}
}
}
有了callback介面,我們來寫我們的webservice呼叫類
HelloWorldWithReturnNonBlock.java
package org.sky.axis2.helloworld;
import org.apache.axis2.addressing.EndpointReference;
import org.apache.axiom.om.OMAbstractFactory;
import org.apache.axiom.om.OMElement;
import org.apache.axiom.om.OMFactory;
import org.apache.axiom.om.OMNamespace;
import org.apache.axis2.AxisFault;
import org.apache.axis2.addressing.EndpointReference;
import org.apache.axis2.client.Options;
import org.apache.axis2.client.ServiceClient;
import org.apache.axis2.client.async.AxisCallback;
import org.apache.axis2.context.MessageContext;
public class HelloWorldWithReturnNonBlock {
private static EndpointReference targetEPR = new EndpointReference(
“http://localhost:8080/Axis2Service/services/HelloWorld”);
public void sayHello() {
OMFactory fac = OMAbstractFactory.getOMFactory();
OMNamespace omNs = fac.createOMNamespace(
“http://helloworld.axis2.sky.org”, “”);
OMElement method = fac.createOMElement(“sayHello”, omNs);
OMElement name = fac.createOMElement(“name”, omNs);
name.setText(“ymk”);
method.addChild(name);
method.build();
Options options = new Options();
options.setTo(targetEPR);
ServiceClient sender = null;
try {
HelloWorldNonBlockCB callback = new HelloWorldNonBlockCB();
sender = new ServiceClient();
sender.setOptions(options);
sender.sendReceiveNonBlocking(method, callback);
synchronized (callback) {
try {
callback.wait();
} catch (InterruptedException e) {
e.printStackTrace();
}
}
} catch (AxisFault e) {
e.printStackTrace();
} finally {
if (sender != null)
try {
sender.cleanup();
} catch (Exception e) {
}
}
}
public static void main(String[] args) {
HelloWorldWithReturnNonBlock testClient = new HelloWorldWithReturnNonBlock();
testClient.sayHello();
}
}
註意加粗標紅處的程式碼。
4.3 非阻塞式雙工HelloWorldWithReturnDualNonBlock.java
非阻塞式的Web Service客戶端程式碼很簡單,在此不做任何擅述,我們就說終極的非阻塞式雙工樣式的Web Service客戶端使用Axis2的API如何實現。
記住以下幾個口決:
options.setUseSeparateListener(true);
非阻塞式雙工樣式,會在客戶端也開啟一個監聽器,而且一直不斷的監聽著伺服器的傳回值,該行程一旦被弔用,會一直被掛在客戶端這邊。
設定webservice客戶端樣式為雙工全開
options.setTransportInProtocol(Constants.TRANSPORT_HTTP);
先定址,後engageModule
在雙工樣式下Web Service的客戶端需要定址,即engageModule,這個engageModule需要這樣的一個引數:
engageModule(“addressing”)
或者也可寫成:
engageModule(Constants.MODULE_ADDRESSING);
這個engageModule就是需要訪問你的工程的WEB-INF\modules\目錄下的一個叫addressing-1.4.mar的檔案。
因此在呼叫engageModule陳述句之間有兩種方式來呼叫你的WEB-INF\modules目錄下的addressing-1.4.mar檔案。
第一種方式:
ConfigurationContext sysContext = ConfigurationContextFactory
.createConfigurationContextFromFileSystem(
“D:\\wspace\\Axis2Service\\WebContent\\WEB-INF”,
null);
sender = new ServiceClient(sysContext, null);
sender.engageModule(Constants.MODULE_ADDRESSING);
第二種方式:
sender = new ServiceClient(sysContext, null);
sender.engageModule(Constants.MODULE_ADDRESSING);
在第二種方式中,不需要為new ServiceClient()指定第一個sysContext引數,但是,你必須把WEB-INF\modules\addressing-1.4.mar指定到你的工程的classpath中去,如下圖

要不然執行時會丟擲下麵這個exception:
org.apache.axis2.AxisFault:Unable to engage module : addressing
下麵來看程式碼,此處的callback我們延用4.2小節中建立的callback介面即可,此處不再重覆,直接給出客戶端程式碼:
package org.sky.axis2.helloworld;
import org.apache.axiom.om.OMAbstractFactory;
import org.apache.axiom.om.OMElement;
import org.apache.axiom.om.OMFactory;
import org.apache.axiom.om.OMNamespace;
import org.apache.axis2.AxisFault;
import org.apache.axis2.Constants;
import org.apache.axis2.addressing.EndpointReference;
import org.apache.axis2.client.Options;
import org.apache.axis2.client.ServiceClient;
import org.apache.axis2.context.ConfigurationContext;
import org.apache.axis2.context.ConfigurationContextFactory;
public class HelloWorldWithReturnDualNonBlock {
private static EndpointReference targetEPR = new EndpointReference(
“http://localhost:8080/Axis2Service/services/HelloWorld”);
public static boolean finish = false;
public void sayHello() {
OMFactory fac = OMAbstractFactory.getOMFactory();
OMNamespace omNs = fac.createOMNamespace(
“http://helloworld.axis2.sky.org”, “”);
OMElement method = fac.createOMElement(“sayHello”, omNs);
OMElement name = fac.createOMElement(“name”, omNs);
name.setText(“ymk”);
method.addChild(name);
method.build();
Options options = new Options();
options.setTo(targetEPR);
options.setTransportInProtocol(Constants.TRANSPORT_HTTP);
options.setUseSeparateListener(true);
options.setAction(“urn:sayHello”);
ServiceClient sender = null;
HelloWorldNonBlockCB callback = new HelloWorldNonBlockCB();
try {
sender = new ServiceClient();
sender.engageModule(Constants.MODULE_ADDRESSING);
sender.setOptions(options);
sender.sendReceiveNonBlocking(method, callback);
synchronized (callback) {
try {
callback.wait();
} catch (InterruptedException e) {
e.printStackTrace();
}
}
} catch (Exception e) {
e.printStackTrace();
} finally {
try {
sender.cleanup();
} catch (Exception e) {
}
}
}
public static void main(String[] args) {
HelloWorldWithReturnDualNonBlock testClient = new HelloWorldWithReturnDualNonBlock();
testClient.sayHello();
}
}
4.4 執行雙工非同步客戶端前的準備工作
將Axis2的安裝目錄下的conf目錄下(如我的是:D:\opensource\axis\axis2-1.4.1-bin\axis2-1.4.1\conf)的axis2.xml複製到你的工程的WEB-INF目錄下。
並確保這個axis2.xml裡有如下陳述句: