

+----------+
| Resource |
|   Owner  |
|          |
+----------+
     ^
     |
    (B)
+----|-----+          Client Identifier      +---------------+
|         -+----(A)-- & Redirection URI ---->|               |
|  User-   |                                 | Authorization |
|  Agent  -+----(B)-- User authenticates --->|     Server    |
|          |                                 |               |
|         -+----(C)-- Authorization Code ---               |
+-|----|---+                                 +---------------+
  |    |                                         ^      v
 (A)  (C)                                        |      |
  |    |                                         |      |
  ^    v                                         |      |
+---------+                                      |      |
|         |>---(D)-- Authorization Code ---------'      |
|  Client |          & Redirection URI                  |
|         |                                             |
|         |'
+---------+       (w/ Optional Refresh Token)
-
客戶端引導資源所有者的使用者代理到授權伺服器的endpoint,一般透過重定向的方式。客戶端提交的資訊應包含客戶端標識(client identifier)、請求範圍(requested scope)、本地狀態(local state)和用於傳回授權碼的重定向地址(redirection URI)
-
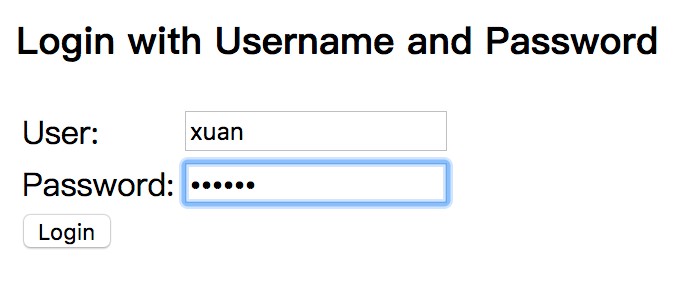
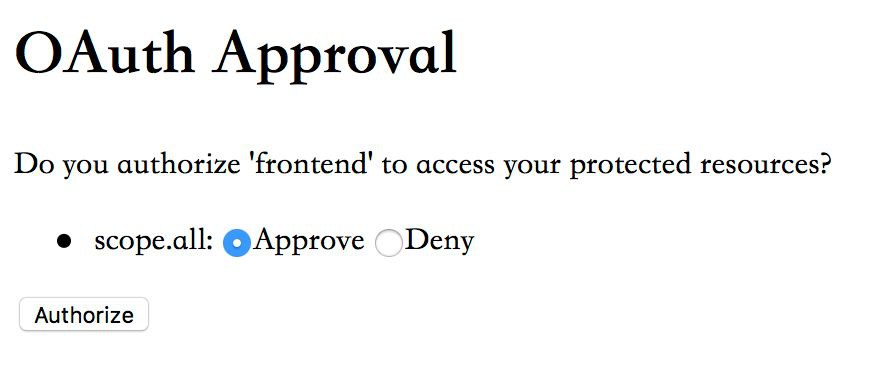
授權伺服器認證資源所有者(透過使用者代理),並確認資源所有者允許還是拒絕客戶端的訪問請求
-
如果資源所有者授予客戶端訪問許可權,授權伺服器透過重定向使用者代理的方式回呼客戶端提供的重定向地址,併在重定向地址中新增授權碼和客戶端先前提供的任何本地狀態
-
客戶端攜帶上一步獲得的授權碼向授權伺服器請求訪問令牌。在這一步中授權碼和客戶端都要被授權伺服器進行認證。客戶端需要提交用於獲取授權碼的重定向地址
-
授權伺服器對客戶端進行身份驗證,和認證授權碼,確保接收到的重定向地址與第三步中用於的獲取授權碼的重定向地址相匹配。如果有效,傳回訪問令牌,可能會有掃清令牌(Refresh Token)
@Configuration
public class WebSecurityConfig extends WebSecurityConfigurerAdapter {
    @Autowired
    CustomLogoutHandler customLogoutHandler;
    @Override
    protected void configure(HttpSecurity http) throws Exception {
        http.csrf().disable()
                .sessionManagement().sessionCreationPolicy(SessionCreationPolicy.IF_REQUIRED)
                .and()
                .requestMatchers().antMatchers("/**")
                .and().authorizeRequests()
                .antMatchers("/**").permitAll()
                .anyRequest().authenticated()
                .and().formLogin()
                .permitAll()
                .and().logout()
                .logoutUrl("/logout")
                .clearAuthentication(true)
                .logoutSuccessHandler(new HttpStatusReturningLogoutSuccessHandler())
                .addLogoutHandler(customLogoutHandler);
    }
}
public class ResourceServerConfig extends ResourceServerConfigurerAdapter {
//    @Override
//    public void configure(HttpSecurity http) throws Exception {
//        http.csrf().disable()
//                .sessionManagement().sessionCreationPolicy(SessionCreationPolicy.STATELESS)
//                .and()
//                .requestMatchers().antMatchers("/**")
//                .and().authorizeRequests()
//                .antMatchers("/**").permitAll()
//                .anyRequest().authenticated()
//                .and().logout()
//                .logoutUrl("/logout")
//                .clearAuthentication(true)
//                .logoutSuccessHandler(new HttpStatusReturningLogoutSuccessHandler())
//                .addLogoutHandler(customLogoutHandler());
//
//        //http.antMatcher("/api/**").addFilterAt(customSecurityFilter(), FilterSecurityInterceptor.class);
//
//    }
 /*   @Bean
    public CustomSecurityFilter customSecurityFilter() {
        return new CustomSecurityFilter();
    }
*/
.....
}
@Component
public class CustomSecurityAuthenticationProvider implements AuthenticationProvider {
    @Autowired
    private UserClient userClient;
    @Override
    public Authentication authenticate(Authentication authentication) throws AuthenticationException {
        String username = authentication.getName();
        String password;
        Map map;
        password = (String) authentication.getCredentials();
        //如果你是呼叫user服務,這邊不用註掉
        //map = userClient.checkUsernameAndPassword(getUserServicePostObject(username, password, type));
        map = checkUsernameAndPassword(getUserServicePostObject(username, password));
        String userId = (String) map.get("userId");
        if (StringUtils.isBlank(userId)) {
            String errorCode = (String) map.get("code");
            throw new BadCredentialsException(errorCode);
        }
        CustomUserDetails customUserDetails = buildCustomUserDetails(username, password, userId);
        return new CustomAuthenticationToken(customUserDetails);
    }
    private CustomUserDetails buildCustomUserDetails(String username, String password, String userId) {
        CustomUserDetails customUserDetails = new CustomUserDetails.CustomUserDetailsBuilder()
                .withUserId(userId)
                .withPassword(password)
                .withUsername(username)
                .withClientId("for Security")
                .build();
        return customUserDetails;
    }
    private Map<String, String> getUserServicePostObject(String username, String password) {
        Map<String, String> requestParam = new HashMap<String, String>();
        requestParam.put("userName", username);
        requestParam.put("password", password);
        return requestParam;
    }
    //模擬呼叫user服務的方法
    private Map checkUsernameAndPassword(Map map) {
        //checkUsernameAndPassword
        Map ret = new HashMap();
        ret.put("userId", UUID.randomUUID().toString());
        return ret;
    }
    @Override
    public boolean supports(Class> aClass) {
        return true;
    }
}
@Configuration
public class AuthenticationManagerConfig extends GlobalAuthenticationConfigurerAdapter {
    @Autowired
    CustomAuthenticationProvider customAuthenticationProvider;
    @Autowired
    CustomSecurityAuthenticationProvider securityAuthenticationProvider;
    @Override
    public void configure(AuthenticationManagerBuilder auth) throws Exception {
        auth.authenticationProvider(customAuthenticationProvider)
                .authenticationProvider(securityAuthenticationProvider);
    }
}

http://localhost:8080/?code=7OglOJ


public interface AuthorizationServerTokenServices {
    // 生成與OAuth2認證系結的access_token
    OAuth2AccessToken createAccessToken(OAuth2Authentication authentication) throws AuthenticationException;
    // 根據refresh_token掃清access_token
    OAuth2AccessToken refreshAccessToken(String refreshToken, TokenRequest tokenRequest)
            throws AuthenticationException;
    // 獲取OAuth2認證的access_token,如果access_token存在的話
    OAuth2AccessToken getAccessToken(OAuth2Authentication authentication);
}
//DefaultTokenServices
@Transactional
public OAuth2AccessToken createAccessToken(OAuth2Authentication authentication) throws AuthenticationException {
    // 從TokenStore獲取access_token
    OAuth2AccessToken existingAccessToken = tokenStore.getAccessToken(authentication);
    OAuth2RefreshToken refreshToken = null;
    if (existingAccessToken != null) {
        if (existingAccessToken.isExpired()) {
            // 如果access_token已經存在但是過期了
            // 刪除對應的access_token和refresh_token
            if (existingAccessToken.getRefreshToken() != null) {
                refreshToken = existingAccessToken.getRefreshToken();
                tokenStore.removeRefreshToken(refreshToken);
            }
            tokenStore.removeAccessToken(existingAccessToken);
        }
        else {
            // 如果access_token已經存在並且沒有過期
            // 重新儲存一下防止authentication改變,並且傳回該access_token
            tokenStore.storeAccessToken(existingAccessToken, authentication);
            return existingAccessToken;
        }
    }
    // 只有當refresh_token為null時,才重新建立一個新的refresh_token
    // 這樣可以使持有過期access_token的客戶端可以根據以前拿到refresh_token拿到重新建立的access_token
    // 因為建立的access_token需要系結refresh_token
    if (refreshToken == null) {
        refreshToken = createRefreshToken(authentication);
    }else if (refreshToken instanceof ExpiringOAuth2RefreshToken) {
        // 如果refresh_token也有期限並且過期,重新建立
        ExpiringOAuth2RefreshToken expiring = (ExpiringOAuth2RefreshToken) refreshToken;
        if (System.currentTimeMillis() > expiring.getExpiration().getTime()) {
            refreshToken = createRefreshToken(authentication);
        }
    }
    // 系結授權使用者和refresh_token建立新的access_token
    OAuth2AccessToken accessToken = createAccessToken(authentication, refreshToken);
    // 將access_token與授權使用者對應儲存
    tokenStore.storeAccessToken(accessToken, authentication);
    // In case it was modified
    refreshToken = accessToken.getRefreshToken();
    if (refreshToken != null) {
        // 將refresh_token與授權使用者對應儲存
        tokenStore.storeRefreshToken(refreshToken, authentication);
    }
    return accessToken;
}


