本文目錄
效果圖
框架思維導圖
使用教程
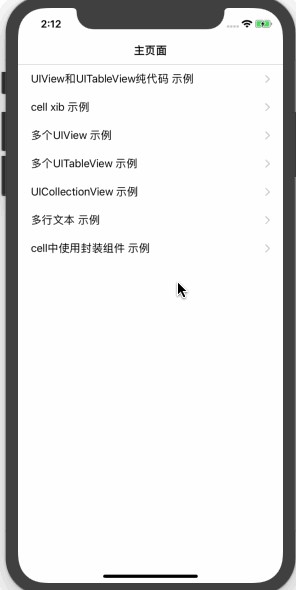
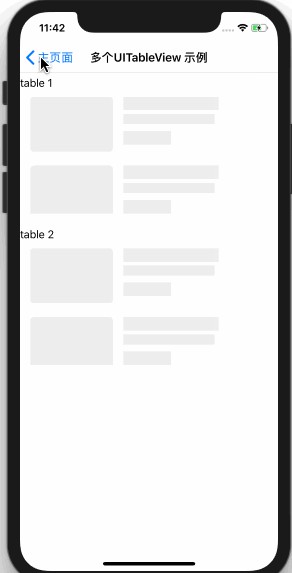
效果圖
1、閃光燈樣式
2、骨架屏樣式
3、經典動畫樣式
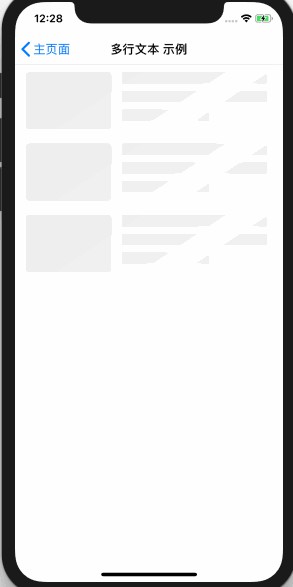
閃光燈動畫.gif
只有骨架屏.gif
經典動畫.gif
本專案思維導圖
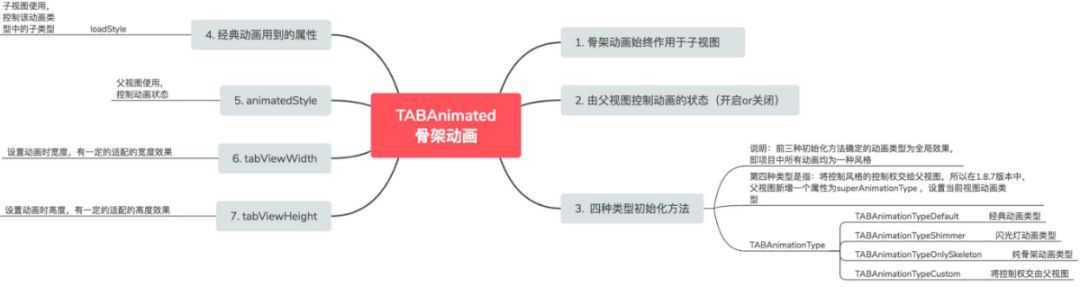
思維導圖.JPG
說明
1、本文將介紹如何將demo整合到你的專案中
2、均為個人思考,轉載請註明出處,謝謝
簡要說明
一般情況下,移動端在展示伺服器端資料時需要經歷
建立檢視 - 請求資料 - 得到資料並展示三個步驟
本框架在未獲得到資料的這段空檔期內,根據檢視已有的位置資訊,映射出一組相同的CALayer檢視以及部分動畫,在獲取到資料後,開發者主動結束動畫時一併移除掉。
使用流程
第一步:Install
CocoaPods
搜尋:pod search TABAnimated
安裝:pod ‘TABAnimated’, ‘~> x.x.x’
第二步:在AppDelegate的didFinishLaunchingWithOptions方法全域性設定TABAnimated的相關屬性
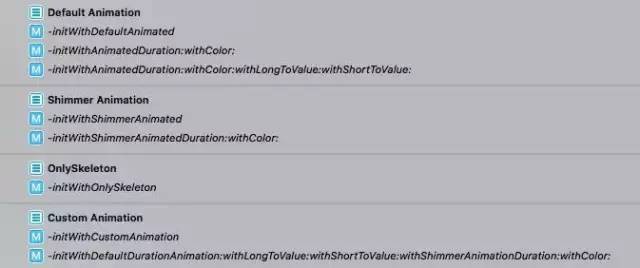
初始化目錄圖.png
// 簡單的示例
[[TABViewAnimated sharedAnimated]initWithOnlySkeleton];
| 初始化目錄 | 名稱 | 是否全域性 | superAnimationType |
|---|---|---|---|
| Default Animation | 經典動畫樣式 | 是 | 該屬性無效 |
| Shimmer Animation | 閃光燈樣式 | 是 | 該屬性無效 |
| OnlySkeleton | 骨架屏樣式 | 是 | 該屬性無效 |
| Custom Animation | 自定義樣式 | 否 | 該屬性有效 |
說明:
1、全域性:專案中所有檢視的所有動畫,都是你所指定的初始化方法的那一種
非全域性:父檢視透過設定superAnimationType,指定該父檢視下的所有子檢視的動畫型別(預設為經典動畫型別)
所以第四種初始化方式和superAnimationType屬性的意義:使得專案中可以用兩種以上動畫型別2、Shimmer和OnlySkeleton的動畫,不需要為子檢視指定動畫型別,將預設設定為
TABAnimationTypeOnlySkeleton,您可以使用demo檢視效果(後面有提到)
選擇設定其他TABAnimated的屬性:
| 屬性名稱 | 適用樣式 | 含義 | 預設值 |
|---|---|---|---|
| animatedColor | 所有樣式 | 動畫顏色 | 0xEEEEEE |
| animatedDuration | 經典動畫樣式 | 伸展來回時長 | 0.4 |
| longToValue | 經典動畫樣式 | 伸展變長時長度 | 1.6 |
| shortToValue | 經典動畫樣式 | 伸展變短時長度 | 0.6 |
| animatedDurationShimmer | 閃光燈樣式 | 閃光燈移動時長 | 1.5 |
第三步,父檢視需要的操作:在需要動畫的view上,將屬性animatedStyle設定為TABTableViewAnimationStart,不需要動畫的view不用做額外的操作
// UIView和UICollectionView列舉
typedef NS_ENUM(NSInteger,TABViewAnimationStyle) {
    TABViewAnimationDefault = 0,               // 預設,沒有動畫
    TABViewAnimationStart,                     // 開始動畫
    TABViewAnimationRuning,                    // 動畫中
    TABViewAnimationEnd,                       // 結束動畫
    TABCollectionViewAnimationStart,           // CollectionView 開始動畫
    TABCollectionViewAnimationRunning,         // CollectionView 動畫中
    TABCollectionViewAnimationEnd              // CollectionView 結束動畫
};

// UITableView列舉
typedef NS_ENUM(NSInteger,TABViewAnimationStyle) {
    TABViewAnimationDefault = 0,    // 沒有動畫,預設
    TABViewAnimationStart,          // 開始動畫
    TABViewAnimationEnd             // 結束動畫
};
// UITableView例子
- (UITableView *)mainTV {
    if (!_mainTV) {
        _mainTV = [[UITableView alloc] initWithFrame:CGRectMake(0, 0, kScreenWidth, kScreenHeight)];
        _mainTV.animatedStyle = TABTableViewAnimationStart;  // 開啟動畫
        _mainTV.delegate = self;
        _mainTV.dataSource = self;
        _mainTV.rowHeight = 100;
        _mainTV.backgroundColor = [UIColor whiteColor];
        _mainTV.estimatedRowHeight = 0;
        _mainTV.estimatedSectionFooterHeight = 0;
        _mainTV.estimatedSectionHeaderHeight = 0;
        _mainTV.separatorStyle = UITableViewCellSeparatorStyleNone;
    }
    return _mainTV;
}

// UIView例子
- (TestHeadView *)headView {
    if (!_headView) {
        _headView = [[TestHeadView alloc]initWithFrame:CGRectMake(0, 0, tab_kScreenWidth, 90)];
        _headView.animatedStyle = TABViewAnimationStart;  //開啟動畫
    }
    return _headView;
}
第四步,子檢視需要的操作 (只有經典動畫樣式,包括自定義樣式下的經典動畫需要此操作):
1、將需要動的元件的屬性
loadStyle,設定為需要的型別(不需要動的元件不用做額外的操作)
2.(儘量不要使用)屬性tabViewWidth,tabViewHeight,其為動畫開啟時該元件的寬度,高度,有預設值
typedef enum {
    TABViewLoadAnimationDefault = 0, //預設沒有動畫
    TABViewLoadAnimationShort,       //動畫先變短再變長
    TABViewLoadAnimationLong         //動畫先變長再變短
}TABViewLoadAnimationStyle;          //view動畫型別列舉
{
        UILabel *lab = [[UILabel alloc]init];
        [lab setFont:tab_kFont(15)];
        lab.loadStyle = TABViewLoadAnimationLong;
        lab.tabViewWidth = 100;
        lab.tabViewWidth = 20;
        [lab setTextColor:[UIColor blackColor]];

        titleLab = lab;
        [self.contentView addSubview:lab];
 }
第五步:在獲取到資料後,停止動畫,如下:
//停止動畫,並掃清資料
_mainTV.animatedStyle = TABTableViewAnimationEnd;
[_mainTV reloadData];

_headView.animatedStyle = TABViewAnimationEnd;
[_headView initWithData:headGame];
註意點(重要):
1、對於UITableView元件,在載入動畫的時候,即未獲得資料時,不要設定對應的數值
- (UITableViewCell *)tableView:(UITableView *)tableView cellForRowAtIndexPath:(NSIndexPath *)indexPath {

    static NSString *str = @"TestTableViewCell";
    TestTableViewCell *cell = [tableView dequeueReusableCellWithIdentifier:str];
    if (!cell) {
        cell = [[TestTableViewCell alloc] initWithStyle:UITableViewCellStyleDefault reuseIdentifier:str];
        cell.selectionStyle = UITableViewCellSelectionStyleNone;
    }

    //在載入動畫的時候,即未獲得資料時,不要走載入控制元件資料的方法
    if (_mainTV.animatedStyle != TABTableViewAnimationStart) {
        [cell initWithData:dataArray[indexPath.row]];
    }

    return cell;
}
2、對於UICollectionView元件:
- (UICollectionViewCell *)collectionView:(UICollectionView *)collectionView cellForItemAtIndexPath:(NSIndexPath *)indexPath {

    static NSString *CellIdentifier = @"TestCollectionViewCell";
    TestCollectionViewCell *cell = (TestCollectionViewCell *)[collectionView dequeueReusableCellWithReuseIdentifier:CellIdentifier forIndexPath:indexPath];

    // 需要加上!!!
    [cell setNeedsLayout];

    // 在載入動畫的時候,即未獲得資料時,不要走載入控制元件資料的方法
    if (_collectionView.animatedStyle != TABCollectionViewAnimationStart) {
        [cell initWithData:dataArray[indexPath.row]];
    }
    return cell;
}
3、特別註意UIView和UICollectionView用的是同一列舉
再囉嗦一下:
1、本文只是簡單的引導作用,你可以用本框架訂製更精美的效果,具體例子github上程式碼都有哦~
2、遇到問題先去demo上看看有沒有使用示例,實在不行聯絡我~
最後:
歡迎在下方討論,同時,如果覺得對你有所幫助的話,能在github上star一下就更好了~
如有問題,可以聯絡我,wx:awh199833
github地址:https://github.com/tigerAndBull/LoadAnimatedDemo-ios
