

-
快速:查詢結果應該實時傳回,提高使用者體驗。
-
靈活:根據不同資料和使用場景,可以調整搜尋過程。
-
最佳建議:對於輸入錯誤,傳回最可能的結果。
-
全文字:除了搜尋關鍵詞和標簽之外,希望能夠搜尋到所有匹配文字。
-
Wikipedia使用Elasticsearch提供全文檢索,提供高亮顯示、search-as-you-type和did-you-mean建議等功能。
-
Guardian使用Elasticsearch將訪問者社交資料整合反饋給作者。
-
Stack Overflow將位置資訊和more-like-this功能與全文字檢索整合提供相關問題和答案。
-
GitHub使用Elasticsearch在一千三百億行程式碼中進行搜尋。

-
安裝Docker——https://docs.docker.com/engine/installation/
-
安裝Docker Compose——https://docs.docker.com/compose/install/
-
/public——為前端 Vue.js webapp存放資料。
-
/server——伺服器端Node.js 源檔案。
-
gs-api——Node.js 容器後端應用邏輯。
-
gs-frontend——為前端webapp提供服務的Nginx容器。
-
gs-search——儲存搜尋資料的Elasticsearch容器。
version: '3'
services:
  api: # Node.js App
    container_name: gs-api
    build: .
    ports:
      - "3000:3000" # Expose API port
      - "9229:9229" # Expose Node process debug port (disable in production)
    environment: # Set ENV vars
     - NODE_ENV=local
     - ES_HOST=elasticsearch
     - PORT=3000
    volumes: # Attach local book data directory
      - ./books:/usr/src/app/books
  frontend: # Nginx Server For Frontend App
    container_name: gs-frontend
    image: nginx
    volumes: # Serve local "public" dir
      - ./public:/usr/share/nginx/html
    ports:
      - "8080:80" # Forward site to localhost:8080
  elasticsearch: # Elasticsearch Instance
    container_name: gs-search
    image: docker.elastic.co/elasticsearch/elasticsearch:6.1.1
    volumes: # Persist ES data in seperate "esdata" volume
      - esdata:/usr/share/elasticsearch/data
    environment:
      - bootstrap.memory_lock=true
      - "ES_JAVA_OPTS=-Xms512m -Xmx512m"
      - discovery.type=single-node
    ports: # Expose Elasticsearch ports
      - "9300:9300"
      - "9200:9200"
volumes: # Define seperate volume for Elasticsearch data
  esdata:
# Use Node v8.9.0 LTS
FROM node:carbon
# Setup app working directory
WORKDIR /usr/src/app
# Copy package.json and package-lock.json
COPY package*.json ./
# Install app dependencies
RUN npm install
# Copy sourcecode
COPY . .
# Start app
CMD [ "npm", "start" ]
node_modules/
npm-debug.log
books/
public/
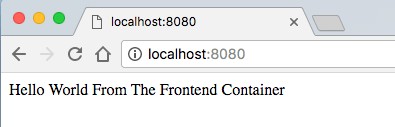
<html><body>Hello World From The Frontend Containerbody>html>
const Koa = require('koa')
const app = new Koa()
app.use(async (ctx, next) => {
  ctx.body = 'Hello World From the Backend Container'
})
const port = process.env.PORT || 3000
app.listen(port, err => {
  if (err) console.error(err)
  console.log(`App Listening on Port ${port}`
  })
{
  "name": "guttenberg-search",
  "version": "0.0.1",
  "description": "Source code for Elasticsearch tutorial using 100 classic open source books.",
  "scripts": {
    "start": "node --inspect=0.0.0.0:9229 server/app.js"
  },
  "repository": {
    "type": "git",
    "url": "git+https://github.com/triestpa/guttenberg-search.git"
  },
  "author": "patrick.triest@gmail.com",
  "license": "MIT",
  "bugs": {
    "url": "https://github.com/triestpa/guttenberg-search/issues"
  },
  "homepage": "https://github.com/triestpa/guttenberg-search#readme",
  "dependencies": {
    "elasticsearch": "13.3.1",
    "joi": "13.0.1",
    "koa": "2.4.1",
    "koa-joi-validate": "0.5.1",
    "koa-router": "7.2.1"
  }
}


{
  "name" : "SLTcfpI",
  "cluster_name" : "docker-cluster",
  "cluster_uuid" : "iId8e0ZeS_mgh9ALlWQ7-w",
  "version" : {
    "number" : "6.1.1",
    "build_hash" : "bd92e7f",
    "build_date" : "2017-12-17T20:23:25.338Z",
    "build_snapshot" : false,
    "lucene_version" : "7.1.0",
    "minimum_wire_compatibility_version" : "5.6.0",
    "minimum_index_compatibility_version" : "5.0.0"
  },
  "tagline" : "You Know, for Search"
}
const elasticsearch = require('elasticsearch')
// Core ES variables for this project
const index = 'library'
const type = 'novel'
const port = 9200
const host = process.env.ES_HOST || 'localhost'
const client = new elasticsearch.Client({ host: { host, port } })
/** Check the ES connection status */
async function checkConnection () {
  let isConnected = false
  while (!isConnected) {
    console.log('Connecting to ES')
    try {
      const health = await client.cluster.health({})
      console.log(health)
      isConnected = true
    } catch (err) {
      console.log('Connection Failed, Retrying...', err)
    }
  }
}
checkConnection()
{ cluster_name: 'docker-cluster',
  status: 'yellow',
  timed_out: false,
  number_of_nodes: 1,
  number_of_data_nodes: 1,
  active_primary_shards: 1,
  active_shards: 1,
  relocating_shards: 0,
  initializing_shards: 0,
  unassigned_shards: 1,
  delayed_unassigned_shards: 0,
  number_of_pending_tasks: 0,
  number_of_in_flight_fetch: 0,
  task_max_waiting_in_queue_millis: 0,
  active_shards_percent_as_number: 50 }
/** Clear the index, recreate it, and add mappings */
async function resetIndex () {
  if (await client.indices.exists({ index })) {
    await client.indices.delete({ index })
  }
  await client.indices.create({ index })
  await putBookMapping()
}
/** Add book section schema mapping to ES */
async function putBookMapping () {
  const schema = {
    title: { type: 'keyword' },
    author: { type: 'keyword' },
    location: { type: 'integer' },
    text: { type: 'text' }
  }
  return client.indices.putMapping({ index, type, body: { properties: schema } })
}
module.exports = {
  client, index, type, checkConnection, resetIndex
}
wget https://cdn.patricktriest.com/data/books.zip
unar books.zip
Title: Heart of Darkness
Author: Joseph Conrad
Release Date: February 1995 [EBook #219]
Last Updated: September 7, 2016
Language: English
Character set encoding: UTF-8
const fs = require('fs')
const path = require('path')
const esConnection = require('./connection')
/** Clear ES index, parse and index all files from the books directory */
async function readAndInsertBooks () {
try {
// Clear previous ES index
await esConnection.resetIndex()
// Read books directory
let files = fs.readdirSync('./books').filter(file => file.slice(-4) === '.txt')
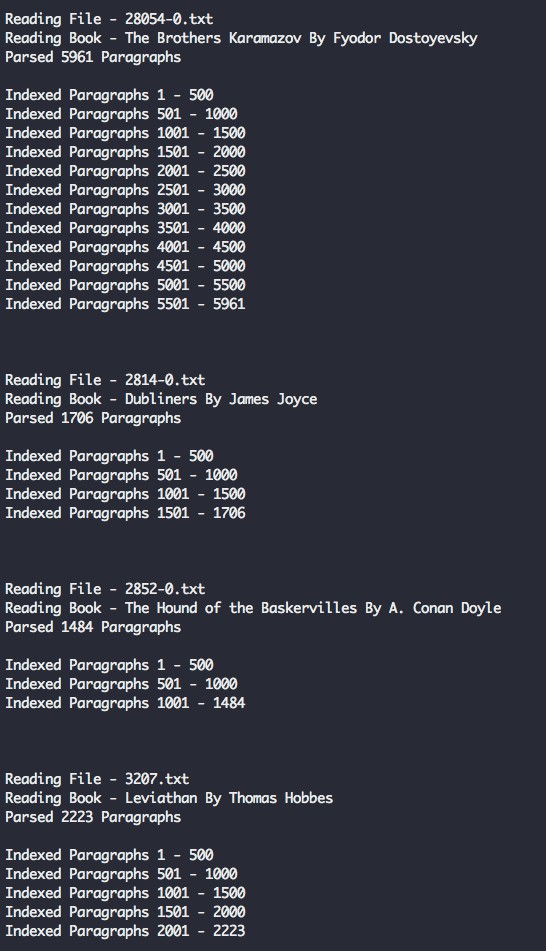
console.log(`Found ${files.length} Files`)
// Read each book file, and index each paragraph in elasticsearch
for (let file of files) {
console.log(`Reading File - ${file}`)
const filePath = path.join('./books', file)
const { title, author, paragraphs } = parseBookFile(filePath)
await insertBookData(title, author, paragraphs)
}
} catch (err) {
console.error(err)
}
}
readAndInsertBooks()


/** Read an individual book text file, and extract the title, author, and paragraphs */
function parseBookFile (filePath) {
  // Read text file
  const book = fs.readFileSync(filePath, 'utf8')
  // Find book title and author
  const title = book.match(/^Title:\s(.+)$/m)[1]
  const authorMatch = book.match(/^Author:\s(.+)$/m)
  const author = (!authorMatch || authorMatch[1].trim() === '') ? 'Unknown Author' : authorMatch[1]
  console.log(`Reading Book - ${title} By ${author}`)
  // Find Guttenberg metadata essay-header and footer
  const startOfBookMatch = book.match(/^\*{3}\s*START OF (THIS|THE) PROJECT GUTENBERG EBOOK.+\*{3}$/m)
  const startOfBookIndex = startOfBookMatch.index + startOfBookMatch[0].length
  const endOfBookIndex = book.match(/^\*{3}\s*END OF (THIS|THE) PROJECT GUTENBERG EBOOK.+\*{3}$/m).index
  // Clean book text and split into array of paragraphs
  const paragraphs = book
    .slice(startOfBookIndex, endOfBookIndex) // Remove Guttenberg essay-header and footer
    .split(/\n\s+\n/g) // Split each paragraph into it's own array entry
    .map(line => line.replace(/\r\n/g, ' ').trim()) // Remove paragraph line breaks and whitespace
    .map(line => line.replace(/_/g, '')) // Guttenberg uses "_" to signify italics.  We'll remove it, since it makes the raw text look messy.
    .filter((line) => (line && line.length !== '')) // Remove empty lines
  console.log(`Parsed ${paragraphs.length} Paragraphs\n`)
  return { title, author, paragraphs }
}
-
從檔案系統中讀入檔案
-
使用正則運算式抽取書名和作者
-
透過定位***,來抽取書中內容
-
解析出段落
-
清洗資料,移除空行

/** Bulk index the book data in Elasticsearch */
async function insertBookData (title, author, paragraphs) {
  let bulkOps = [] // Array to store bulk operations
  // Add an index operation for each section in the book
  for (let i = 0; i < paragraphs.length; i++) {
    // Describe action
    bulkOps.push({ index: { _index: esConnection.index, _type: esConnection.type } })
    // Add document
    bulkOps.push({
      author,
      title,
      location: i,
      text: paragraphs[i]
    })
    if (i > 0 && i % 500 === 0) { // Do bulk insert in 500 paragraph batches
      await esConnection.client.bulk({ body: bulkOps })
      bulkOps = []
      console.log(`Indexed Paragraphs ${i - 499} - ${i}`)
    }
  }
  // Insert remainder of bulk ops array
  await esConnection.client.bulk({ body: bulkOps })
  console.log(`Indexed Paragraphs ${paragraphs.length - (bulkOps.length / 2)} - ${paragraphs.length}\n\n\n`)
}
{
  "took" : 11,
  "timed_out" : false,
  "_shards" : {
    "total" : 5,
    "successful" : 5,
    "skipped" : 0,
    "failed" : 0
  },
  "hits" : {
    "total" : 13,
    "max_score" : 14.259304,
    "hits" : [
      {
        "_index" : "library",
        "_type" : "novel",
        "_id" : "p_GwFWEBaZvLlaAUdQgV",
        "_score" : 14.259304,
        "_source" : {
          "author" : "Charles Darwin",
          "title" : "On the Origin of Species",
          "location" : 1080,
          "text" : "Java, plants of, 375."
        }
      },
      {
        "_index" : "library",
        "_type" : "novel",
        "_id" : "wfKwFWEBaZvLlaAUkjfk",
        "_score" : 10.186235,
        "_source" : {
          "author" : "Edgar Allan Poe",
          "title" : "The Works of Edgar Allan Poe",
          "location" : 827,
          "text" : "After many years spent in foreign travel, I sailed in the year 18-- , from the port of Batavia, in the rich and populous island of Java, on a voyage to the Archipelago of the Sunda islands. I went as passenger--having no other inducement than a kind of nervous restlessness which haunted me as a fiend."
        }
      },
      ...
    ]
  }
}
const { client, index, type } = require('./connection')
module.exports = {
  /** Query ES index for the provided term */
  queryTerm (term, offset = 0) {
    const body = {
      from: offset,
      query: { match: {
        text: {
          query: term,
          operator: 'and',
          fuzziness: 'auto'
        } } },
      highlight: { fields: { text: {} } }
    }
    return client.search({ index, type, body })
  }
}
-
from:為結果標出頁碼。每次查詢預設傳回10個結果;因此指定from為10,可以直接顯示10-20的查詢結果。
-
query:具體查詢關鍵詞。
-
operator:具體查詢操作;本例中採用“and”運運算元,優先顯示包含所有查詢關鍵詞的結果。
-
fuzziness:錯誤拼寫修正級別(或者是模糊查詢級別),預設是2。數值越高,允許模糊度越高;例如數值1,會對Patricc的查詢傳回Patrick結果。
-
highlights:傳回額外資訊,其中包含HTML格式顯示匹配文字資訊。
const Koa = require('koa')
const Router = require('koa-router')
const joi = require('joi')
const validate = require('koa-joi-validate')
const search = require('./search')
const app = new Koa()
const router = new Router()
// Log each request to the console
app.use(async (ctx, next) => {
  const start = Date.now()
  await next()
  const ms = Date.now() - start
  console.log(`${ctx.method} ${ctx.url} - ${ms}`)
})
// Log percolated errors to the console
app.on('error', err => {
  console.error('Server Error', err)
})
// Set permissive CORS essay-header
app.use(async (ctx, next) => {
  ctx.set('Access-Control-Allow-Origin', '*')
  return next()
})
// ADD ENDPOINTS HERE
const port = process.env.PORT || 3000
app
  .use(router.routes())
  .use(router.allowedMethods())
  .listen(port, err => {
    if (err) throw err
    console.log(`App Listening on Port ${port}`)
  })
/**
 * GET /search
 * Search for a term in the library
 */
router.get('/search', async (ctx, next) => {
    const { term, offset } = ctx.request.query
    ctx.body = await search.queryTerm(term, offset)
  }
)
{
    "took": 242,
    "timed_out": false,
    "_shards": {
        "total": 5,
        "successful": 5,
        "skipped": 0,
        "failed": 0
    },
    "hits": {
        "total": 93,
        "max_score": 13.356944,
        "hits": [{
            "_index": "library",
            "_type": "novel",
            "_id": "eHYHJmEBpQg9B4622421",
            "_score": 13.356944,
            "_source": {
                "author": "Charles Darwin",
                "title": "On the Origin of Species",
                "location": 1080,
                "text": "Java, plants of, 375."
            },
            "highlight": {
                "text": ["Java, plants of, 375."]
            }
        }, {
            "_index": "library",
            "_type": "novel",
            "_id": "2HUHJmEBpQg9B462xdNg",
            "_score": 9.030668,
            "_source": {
                "author": "Unknown Author",
                "title": "The King James Bible",
                "location": 186,
                "text": "10:4 And the sons of Javan; Elishah, and Tarshish, Kittim, and Dodanim."
            },
            "highlight": {
                "text": ["10:4 And the sons of Javan; Elishah, and Tarshish, Kittim, and Dodanim."]
            }
        }
        ...
      ]
   }
}
/**
 * GET /search
 * Search for a term in the library
 * Query Params -
 * term: string under 60 characters
 * offset: positive integer
 */
router.get('/search',
  validate({
    query: {
      term: joi.string().max(60).required(),
      offset: joi.number().integer().min(0).default(0)
    }
  }),
  async (ctx, next) => {
    const { term, offset } = ctx.request.query
    ctx.body = await search.queryTerm(term, offset)
  }
)
const vm = new Vue ({
  el: '#vue-instance',
  data () {
    return {
      baseUrl: 'http://localhost:3000', // API url
      searchTerm: 'Hello World', // Default search term
      searchDebounce: null, // Timeout for search bar debounce
      searchResults: [], // Displayed search results
      numHits: null, // Total search results found
      searchOffset: 0, // Search result pagination offset
      selectedParagraph: null, // Selected paragraph object
      bookOffset: 0, // Offset for book paragraphs being displayed
      paragraphs: [] // Paragraphs being displayed in book preview window
    }
  },
  async created () {
    this.searchResults = await this.search() // Search for default term
  },
  methods: {
    /** Debounce search input by 100 ms */
    onSearchInput () {
      clearTimeout(this.searchDebounce)
      this.searchDebounce = setTimeout(async () => {
        this.searchOffset = 0
        this.searchResults = await this.search()
      }, 100)
    },
    /** Call API to search for inputted term */
    async search () {
      const response = await axios.get(`${this.baseUrl}/search`, { params: { term: this.searchTerm, offset: this.searchOffset } })
      this.numHits = response.data.hits.total
      return response.data.hits.hits
    },
    /** Get next page of search results */
    async nextResultsPage () {
      if (this.numHits > 10) {
        this.searchOffset += 10
        if (this.searchOffset + 10 > this.numHits) { this.searchOffset = this.numHits - 10}
        this.searchResults = await this.search()
        document.documentElement.scrollTop = 0
      }
    },
    /** Get previous page of search results */
    async prevResultsPage () {
      this.searchOffset -= 10
      if (this.searchOffset < 0) { this.searchOffset = 0 }
      this.searchResults = await this.search()
      document.documentElement.scrollTop = 0
    }
  }
})
<html lang="en">
<head>
  <meta charset="utf-8">
  <title>Elastic Librarytitle>
<meta name=“description” content=“Literary Classic Search Engine.”>
<meta name=“viewport” content=“width=device-width, initial-scale=1, maximum-scale=1, user-scalable=no”>
<link href=“https://cdnjs.cloudflare.com/ajax/libs/normalize/7.0.0/normalize.min.css” rel=“stylesheet” type=“text/css” />
<link href=“https://cdn.muicss.com/mui-0.9.20/css/mui.min.css” rel=“stylesheet” type=“text/css” />
<link href=“https://fonts.googleapis.com/css?family=EB+Garamond:400,700|Open+Sans” rel=“stylesheet”>
<link href=“styles.css” rel=“stylesheet” />
head>
<body>
<div class=“app-container” id=“vue-instance”>
<div class=“mui-panel”>
<div class=“mui-textfield”>
<input v-model=“searchTerm” type=“text” v-on:keyup=“onSearchInput()”>
<label>Searchlabel>
div>
div>
<div class=“mui-panel”>
<div class=“mui–text-headline”>{{ numHits }} Hitsdiv>
<div class=“mui–text-subhead”>Displaying Results {{ searchOffset }} – {{ searchOffset + 9 }}div>
div>
<div class=“mui-panel pagination-panel”>
<button class=“mui-btn mui-btn–flat” v-on:click=“prevResultsPage()”>Prev Pagebutton>
<button class=“mui-btn mui-btn–flat” v-on:click=“nextResultsPage()”>Next Pagebutton>
div>
<div class=“search-results” ref=“searchResults”>
<div class=“mui-panel” v-for=“hit in searchResults” v-on:click=“showBookModal(hit)”>
<div class=“mui–text-title” v-html=“hit.highlight.text[0]”>div>
<div class=“mui-divider”>div>
<div class=“mui–text-subhead”>{{ hit._source.title }} – {{ hit._source.author }}div>
<div class=“mui–text-body2”>Location {{ hit._source.location }}div>
div>
div>
<div class=“mui-panel pagination-panel”>
<button class=“mui-btn mui-btn–flat” v-on:click=“prevResultsPage()”>Prev Pagebutton>
<button class=“mui-btn mui-btn–flat” v-on:click=“nextResultsPage()”>Next Pagebutton>
div>
div>
<script src=“https://cdn.muicss.com/mui-0.9.28/js/mui.min.js”>script>
<script src=“https://cdnjs.cloudflare.com/ajax/libs/vue/2.5.3/vue.min.js”>script>
<script src=“https://cdnjs.cloudflare.com/ajax/libs/axios/0.17.0/axios.min.js”>script>
<script src=“app.js”>script>
body>
html>
body { font-family: 'EB Garamond', serif; }
.mui-textfield > input, .mui-btn, .mui--text-subhead, .mui-panel > .mui--text-headline {
  font-family: 'Open Sans', sans-serif;
}
.all-caps { text-transform: uppercase; }
.app-container { padding: 16px; }
.search-results em { font-weight: bold; }
.book-modal > button { width: 100%; }
.search-results .mui-divider { margin: 14px 0; }
.search-results {
  display: flex;
  flex-direction: row;
  flex-wrap: wrap;
  justify-content: space-around;
}
.search-results > div {
  flex-basis: 45%;
  box-sizing: border-box;
  cursor: pointer;
}
@media (max-width: 600px) {
  .search-results > div { flex-basis: 100%; }
}
.paragraphs-container {
  max-width: 800px;
  margin: 0 auto;
  margin-bottom: 48px;
}
.paragraphs-container .mui--text-body1, .paragraphs-container .mui--text-body2 {
  font-size: 1.8rem;
  line-height: 35px;
}
.book-modal {
  width: 100%;
  height: 100%;
  padding: 40px 10%;
  box-sizing: border-box;
  margin: 0 auto;
  background-color: white;
  overflow-y: scroll;
  position: fixed;
  top: 0;
  left: 0;
}
.pagination-panel {
  display: flex;
  justify-content: space-between;
}
.title-row {
  display: flex;
  justify-content: space-between;
  align-items: flex-end;
}
@media (max-width: 600px) {
  .title-row{
    flex-direction: column;
    text-align: center;
    align-items: center
  }
}
.locations-label {
  text-align: center;
  margin: 8px;
}
.modal-footer {
  position: fixed;
  bottom: 0;
  left: 0;
  width: 100%;
  display: flex;
  justify-content: space-around;
  background: white;
}

/** Get the specified range of paragraphs from a book */
getParagraphs (bookTitle, startLocation, endLocation) {
  const filter = [
    { term: { title: bookTitle } },
    { range: { location: { gte: startLocation, lte: endLocation } } }
  ]
  const body = {
    size: endLocation - startLocation,
    sort: { location: 'asc' },
    query: { bool: { filter } }
  }
  return client.search({ index, type, body })
}
/**
 * GET /paragraphs
 * Get a range of paragraphs from the specified book
 * Query Params -
 * bookTitle: string under 256 characters
 * start: positive integer
 * end: positive integer greater than start
 */
router.get('/paragraphs',
  validate({
    query: {
      bookTitle: joi.string().max(256).required(),
      start: joi.number().integer().min(0).default(0),
      end: joi.number().integer().greater(joi.ref('start')).default(10)
    }
  }),
  async (ctx, next) => {
    const { bookTitle, start, end } = ctx.request.query
    ctx.body = await search.getParagraphs(bookTitle, start, end)
  }
)
    /** Call the API to get current page of paragraphs */
    async getParagraphs (bookTitle, offset) {
      try {
        this.bookOffset = offset
        const start = this.bookOffset
        const end = this.bookOffset + 10
        const response = await axios.get(`${this.baseUrl}/paragraphs`, { params: { bookTitle, start, end } })
        return response.data.hits.hits
      } catch (err) {
        console.error(err)
      }
    },
    /** Get next page (next 10 paragraphs) of selected book */
    async nextBookPage () {
      this.$refs.bookModal.scrollTop = 0
      this.paragraphs = await this.getParagraphs(this.selectedParagraph._source.title, this.bookOffset + 10)
    },
    /** Get previous page (previous 10 paragraphs) of selected book */
    async prevBookPage () {
      this.$refs.bookModal.scrollTop = 0
      this.paragraphs = await this.getParagraphs(this.selectedParagraph._source.title, this.bookOffset - 10)
    },
    /** Display paragraphs from selected book in modal window */
    async showBookModal (searchHit) {
      try {
        document.body.style.overflow = 'hidden'
        this.selectedParagraph = searchHit
        this.paragraphs = await this.getParagraphs(searchHit._source.title, searchHit._source.location - 5)
      } catch (err) {
        console.error(err)
      }
    },
    /** Close the book detail modal */
    closeBookModal () {
      document.body.style.overflow = 'auto'
      this.selectedParagraph = null
    }
    <div v-if="selectedParagraph" ref="bookModal" class="book-modal">
      <div class="paragraphs-container">

        <div class="title-row">
          <div class="mui--text-display2 all-caps">{{ selectedParagraph._source.title }}div>
<div class=“mui–text-display1”>{{ selectedParagraph._source.author }}div>
div>
<br>
<div class=“mui-divider”>div>
<div class=“mui–text-subhead locations-label”>Locations {{ bookOffset – 5 }} to {{ bookOffset + 5 }}div>
<div class=“mui-divider”>div>
<br>
<div v-for=“paragraph in paragraphs”>
<div v-if=“paragraph._source.location === selectedParagraph._source.location” class=“mui–text-body2”>
<strong>{{ paragraph._source.text }}strong>
div>
<div v-else class=“mui–text-body1”>
{{ paragraph._source.text }}
div>
<br>
div>
div>
<div class=“modal-footer”>
<button class=“mui-btn mui-btn–flat” v-on:click=“prevBookPage()”>Prev Pagebutton>
<button class=“mui-btn mui-btn–flat” v-on:click=“closeBookModal()”>Closebutton>
<button class=“mui-btn mui-btn–flat” v-on:click=“nextBookPage()”>Next Pagebutton>
div>
div>

-
在應用中新增更多喜愛的書,建立自己私有庫搜尋引擎。
-
透過索引Google Scholar論文,建立一個防抄襲引擎。
-
透過索引字典中單詞到ES中,建立拼寫檢查應用。
-
透過載入Common Crawl Corpus到ES(註意,有50億頁內容,是一個非常巨大資料集),建立自己的與谷歌競爭的網際網路搜尋引擎。
-
在新聞業中使用Elasticsearch:在例如Panama論文和Paradise論文集中搜索特點名稱和詞條。
-
https://www.elastic.co/guide/en/elasticsearch/reference/current/full-text-queries.html
-
https://vuejs.org/v2/guide/
-
https://search.patricktriest.com
-
https://github.com/triestpa/guttenberg-search
