- 檔案上傳
- 匯入依賴
- 配置檔案
- 禁用 thymeleaf 快取
- 具體程式碼
- 上傳頁面
- 控制層
- 主函式
- 測試
- 總結
- 說點什麼
SpringBoot是為了簡化Spring應用的建立、執行、除錯、部署等一系列問題而誕生的產物,自動裝配的特性讓我們可以更好的關註業務本身而不是外部的XML配置,我們只需遵循規範,引入相關的依賴就可以輕易的搭建出一個 WEB 工程
檔案上傳和下載是JAVA WEB中常見的一種操作,檔案上傳主要是將檔案透過IO流傳輸到伺服器的某一個特定的檔案夾下;剛開始工作那會一個上傳檔案常常花費小半天的時間,繁瑣的程式碼量以及XML配置讓我是痛不欲生;值得慶幸的是有了Spring Boot短短的幾句程式碼就能實現檔案上傳與本地寫入操作….
檔案上傳
檔案上傳和下載是JAVA WEB中常見的一種操作,檔案上傳主要是將檔案透過IO流傳輸到伺服器的某一個特定的檔案夾下;剛開始工作那會一個上傳檔案常常花費小半天的時間,繁瑣的程式碼量以及XML配置讓我是痛不欲生;值得慶幸的是有了Spring Boot短短的幾句程式碼就能實現檔案上傳與本地寫入操作….
匯入依賴
在 pom.xml 中新增上 spring-boot-starter-web 和 spring-boot-starter-thymeleaf 的依賴
<dependencies>
    <dependency>
        <groupId>org.springframework.bootgroupId>
<artifactId>spring-boot-starter-webartifactId>
dependency>
<dependency>
<groupId>org.springframework.bootgroupId>
<artifactId>spring-boot-starter-thymeleafartifactId>
dependency>
<dependency>
<groupId>org.springframework.bootgroupId>
<artifactId>spring-boot-starter-testartifactId>
<scope>testscope>
dependency>
dependencies>
配置檔案
預設情況下 Spring Boot 無需做任何配置也能實現檔案上傳的功能,但有可能因預設配置不符而導致檔案上傳失敗問題,所以瞭解相關配置資訊更有助於我們對問題的定位和修複;
# 禁用 thymeleaf 快取
spring.thymeleaf.cache=false
# 是否支援批次上傳   (預設值 true)
spring.servlet.multipart.enabled=true
# 上傳檔案的臨時目錄 (一般情況下不用特意修改)
spring.servlet.multipart.location=
# 上傳檔案最大為 1M (預設值 1M 根據自身業務自行控制即可)
spring.servlet.multipart.max-file-size=1048576
# 上傳請求最大為 10M(預設值10M 根據自身業務自行控制即可)
spring.servlet.multipart.max-request-size=10485760
# 檔案大小閾值,當大於這個閾值時將寫入到磁碟,否則存在記憶體中,(預設值0 一般情況下不用特意修改)
spring.servlet.multipart.file-size-threshold=0
# 判斷是否要延遲解析檔案(相當於懶載入,一般情況下不用特意修改)
spring.servlet.multipart.resolve-lazily=false
如預設只允許1M以下的檔案,當超出該範圍則會丟擲下述錯誤
org.apache.tomcat.util.http.fileupload.FileUploadBase$SizeLimitExceededException:
the request was rejected because its size (20738021) exceeds the configured maximum (10485760)
具體程式碼
上傳頁面
在 src/main/resources 目錄下新建 static 目錄和 templates 目錄。在 templates 中新建一個 index.html 的模板檔案;此處實現 單檔案上傳、多檔案上傳、BASE64編碼 三種上傳方式,其中 BASE64 的方式在對Android/IOS/H5等方面還是不錯的…
html>

<html xmlns="http://www.w3.org/1999/xhtml"
      xmlns:th="http://www.thymeleaf.org">
<head>
    <meta charset="UTF-8">
    <title>檔案上傳title>head>
<body>

<h2>單一檔案上傳示例h2>
<div>
    <form method="POST" enctype="multipart/form-data" action="/uploads/upload1">
        <p>
            檔案1:<input type="file" name="file"/>
            <input type="submit" value="上傳"/>
        p>
    form>
div>

<hr/>
<h2>批次檔案上傳示例h2>

<div>
    <form method="POST" enctype="multipart/form-data"
          action="/uploads/upload2">
        <p>
            檔案1:<input type="file" name="file"/>
        p>
        <p>
            檔案2:<input type="file" name="file"/>
        p>
        <p>
            <input type="submit" value="上傳"/>
        p>
    form>
div>

<hr/>
<h2>Base64檔案上傳h2>
<div>
    <form method="POST" action="/uploads/upload3">
        <p>
            BASE64編碼:<textarea name="base64" rows="10" cols="80">textarea>
            <input type="submit" value="上傳"/>
        p>
    form>
div>

body>
html>
控制層
建立一個FileUploadController,其中@GetMapping的方法用來跳轉index.html頁面,而@PostMapping相關方法則是對應的 單檔案上傳、多檔案上傳、BASE64編碼 三種處理方式。
@RequestParam(“file”) 此處的”file”對應的就是html 中 name=”file” 的 input 標簽,而將檔案真正寫入的還是藉助的commons-io中的FileUtils.copyInputStreamToFile(inputStream,file)
package com.battcn.controller;
import org.slf4j.Logger;
import org.slf4j.LoggerFactory;
import org.springframework.stereotype.Controller;
import org.springframework.util.Base64Utils;
import org.springframework.util.FileCopyUtils;
import org.springframework.web.bind.annotation.*;
import org.springframework.web.multipart.MultipartFile;
import java.io.File;
import java.io.IOException;
import java.util.ArrayList;
import java.util.HashMap;
import java.util.List;
import java.util.Map;
/**
* 圖片上傳的幾種方式
*
* @author Levin
* @since 2018/5/31 0031
*/
@Controller
@RequestMapping("/uploads")
public class FileUploadController {
private static final Logger log = LoggerFactory.getLogger(FileUploadController.class);
@GetMapping
public String index() {
return "index";
}
@PostMapping("/upload1")
@ResponseBody
public Map upload1(@RequestParam("file") MultipartFile file) throws IOException {
log.info("[檔案型別] - [{}]", file.getContentType());
log.info("[檔案名稱] - [{}]", file.getOriginalFilename());
log.info("[檔案大小] - [{}]", file.getSize());
// TODO 將檔案寫入到指定目錄(具體開發中有可能是將檔案寫入到雲儲存/或者指定目錄透過 Nginx 進行 gzip 壓縮和反向代理,此處只是為了演示故將地址寫成本地電腦指定目錄)
file.transferTo(new File("F:\\app\\chapter16\\" + file.getOriginalFilename()));
Map result = new HashMap<>(16);
result.put("contentType", file.getContentType());
result.put("fileName", file.getOriginalFilename());
result.put("fileSize", file.getSize() + "");
return result;
}
@PostMapping("/upload2")
@ResponseBody
public List
主函式
package com.battcn;

import org.springframework.boot.SpringApplication;
import org.springframework.boot.autoconfigure.SpringBootApplication;


/**
 * @author Levin
 */
@SpringBootApplication
public class Chapter16Application {

    public static void main(String[] args) {
        SpringApplication.run(Chapter16Application.class, args);
    }

}
測試
完成準備事項後,啟動Chapter16Application,訪問 http://localhost:8080/uploads 進入到檔案上傳頁面。單檔案上傳、多檔案上傳 都是及其簡單的就不做演示了,相信各位自己也是可以完成的。

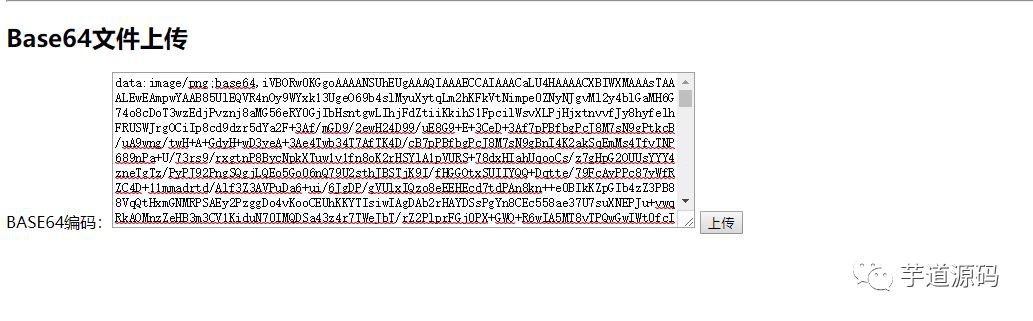
BASE64 測試方法
開啟瀏覽器訪問 http://base64.xpcha.com/pic.html 選擇一張圖片將其轉換為base64編碼的,隨後將轉換後的base64字串內容 複製到下圖中的文字框中,點選上傳即可,隨後到指定目錄下就可以看到我們上傳的檔案了
總結
目前很多大佬都寫過關於 SpringBoot 的教程了,如有雷同,請多多包涵,本教程基於最新的 spring-boot-starter-parent:2.0.2.RELEASE編寫,包括新版本的特性都會一起介紹…
說點什麼
全文程式碼:https://github.com/battcn/spring-boot2-learning/tree/master/chapter16
